
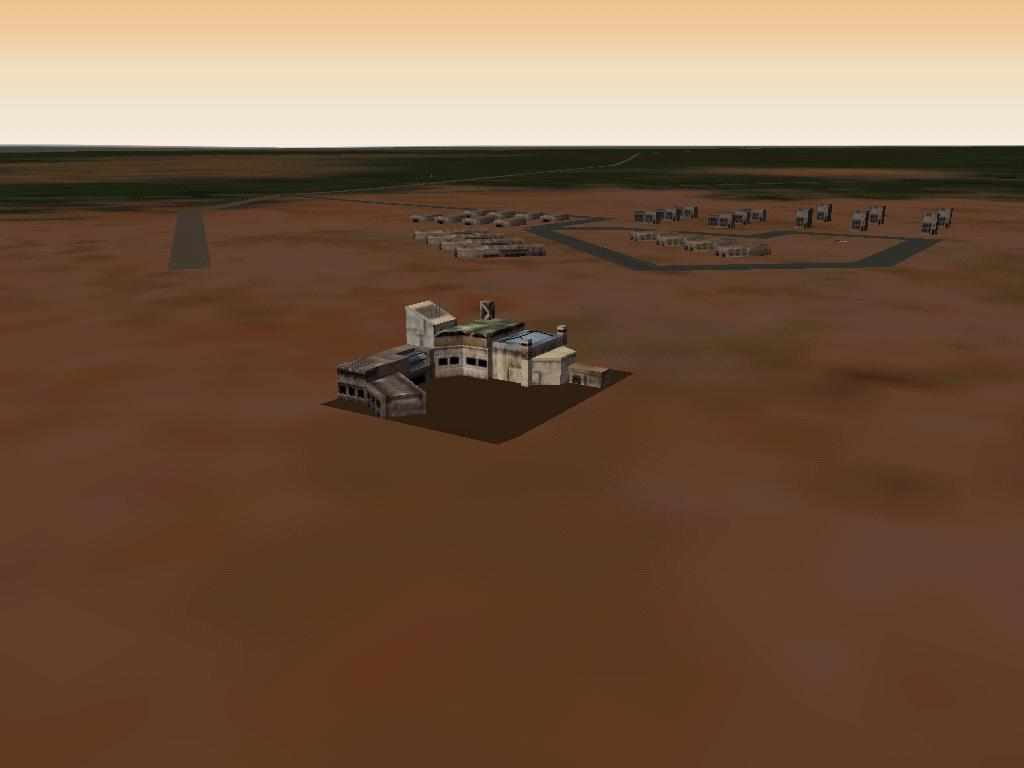 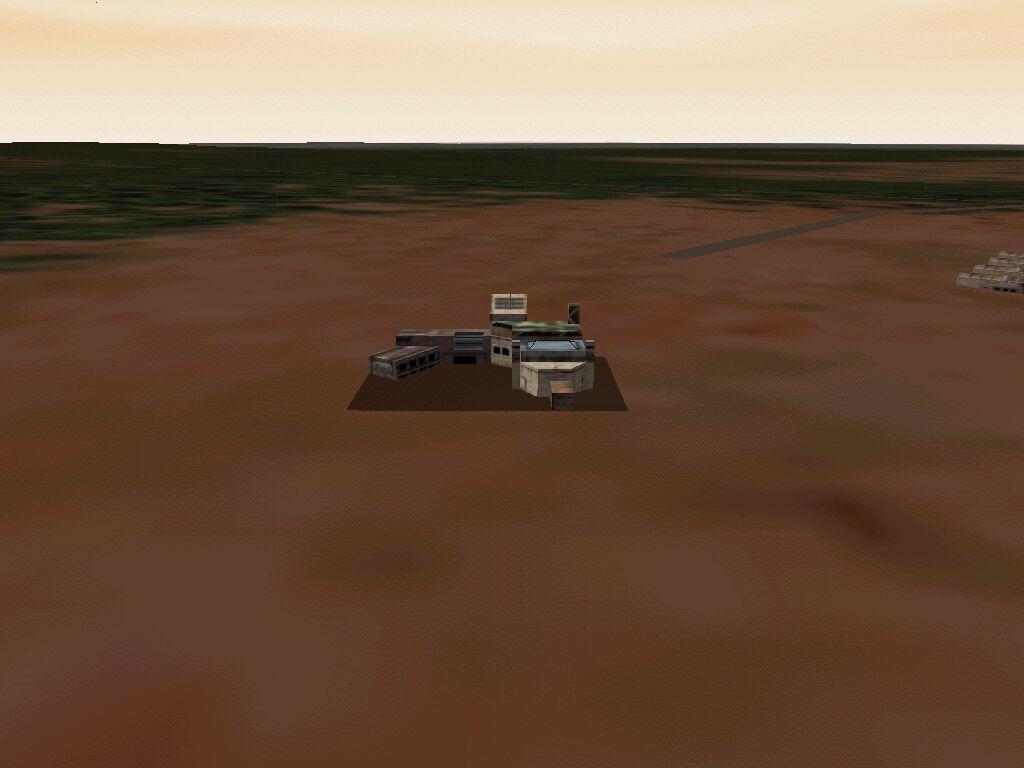
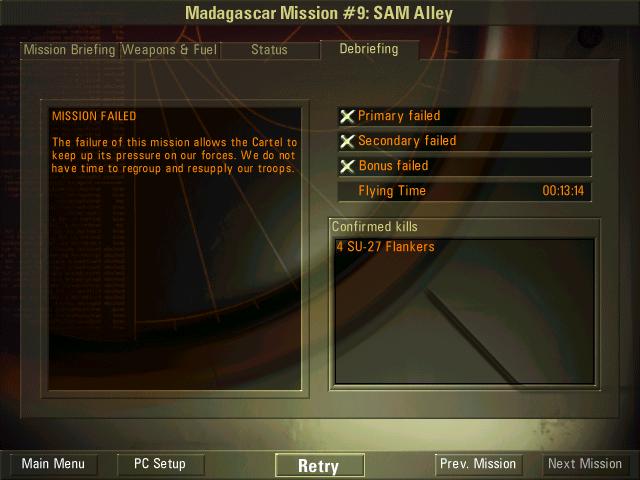
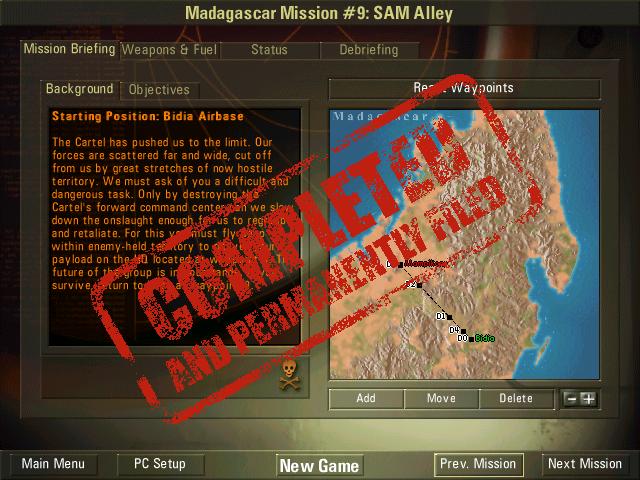
Click on the pics above for larger size... To see the main target... |
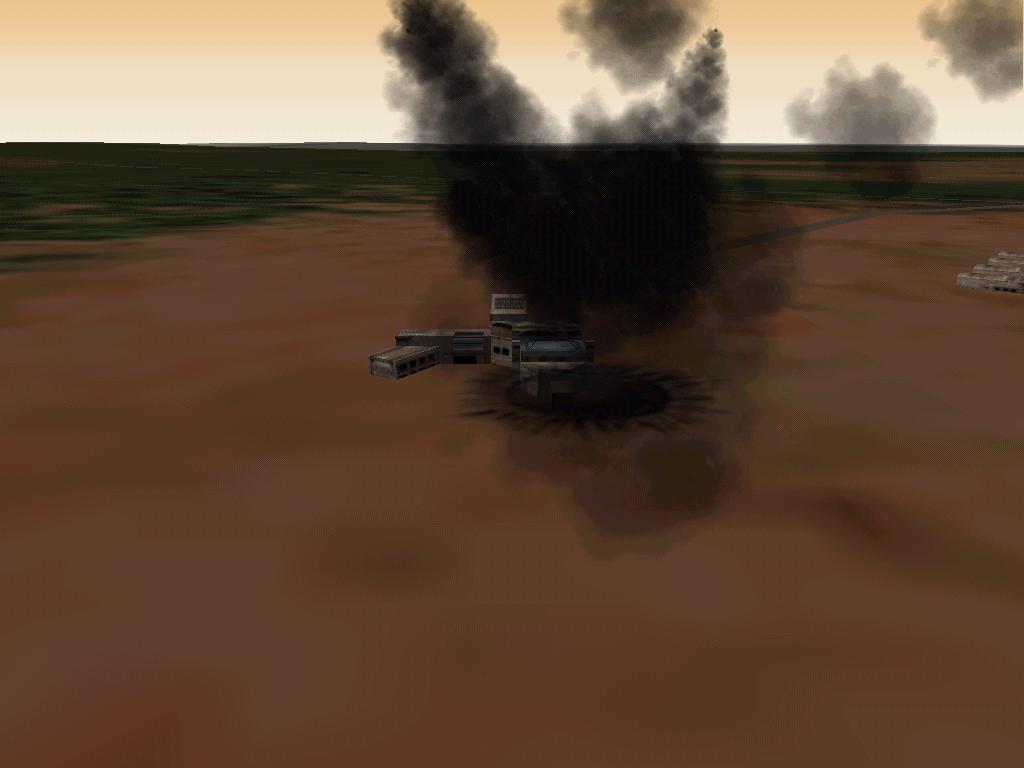
Click on the pic above for larger size... To see how the main target is being demolished... See the enemy command post by clicking on the pics given at the left side... To find it is very difficult... First you have to clear enemy ground targets suchs as anti - aircraft guns (AA), SAM units (Radars and launchers) and ofcourse damned ZSU - 23s... So, you have to be carefull... As i mentioned just before, there are too many enemy ground threats... Especially the anti - aircraft guns (AA)... You have to be hurry up as soon as possible... The enemy command post is located at almost the farthest place at the way - point 03... By the way, ensure that the your fuel is enough for returning to the our base located at the WP - 00... |
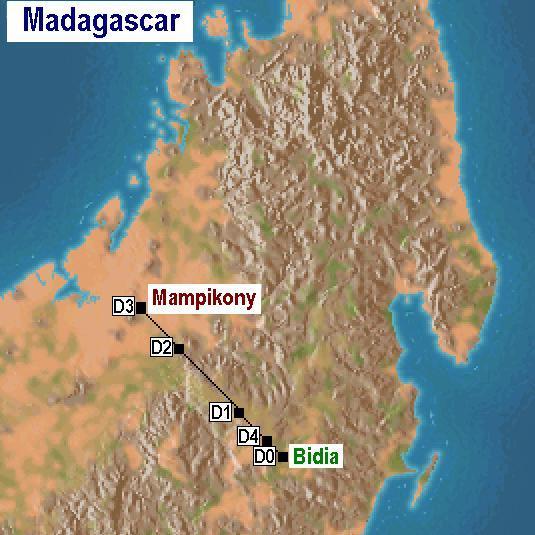
Click on the pic above for larger size... To see the main target's route... |
Now... Let's go to the tactic... Modified pic shown at the left side shows you the main target's route... You have to take - off from our main air - base (Bidia)... Then, you have to go to the WP - 03 (Mampikony) at which the primary objective's target was constructed... Along this route, you have to eliminate 3 enemy ground forces, first WP - 04, WP - 01 and finally WP - 02... According to my results, you will have more than 80 (in my opinion may be 90) ground threats while you are flying... I have kicked off almost of them... You can see it at the "Madagascar 09 - Open - Air Section"... But, it takes time and especially requires patience... I did it... You can do... |
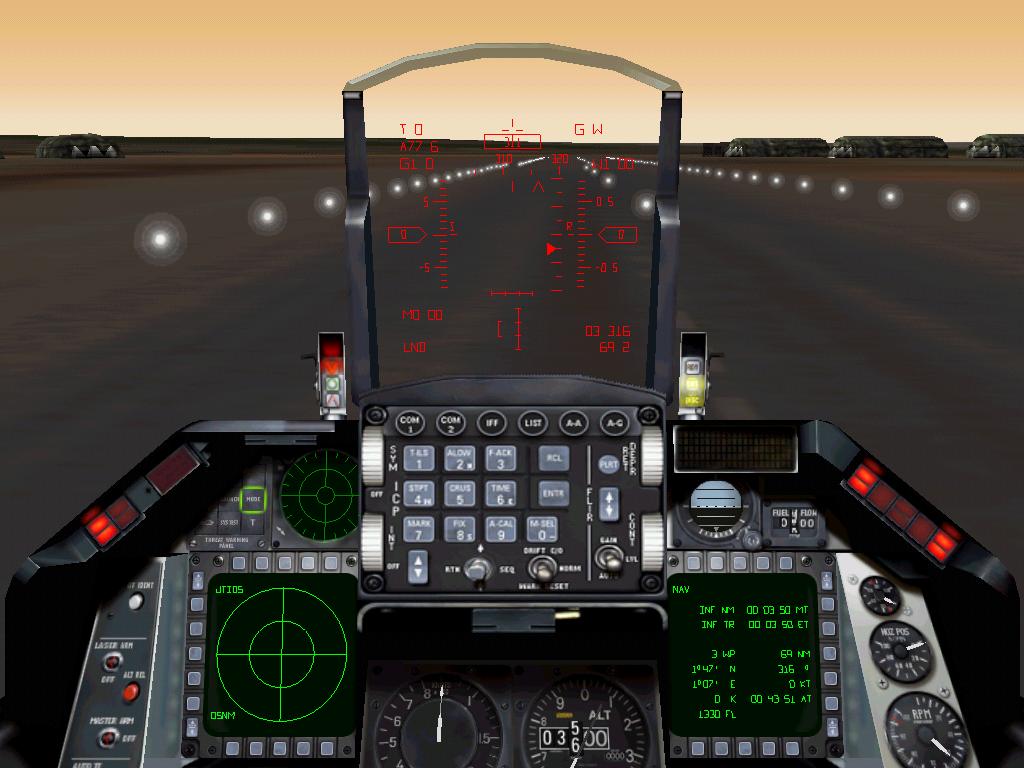
Click on the pic above for larger size... To see the our position on the our air - base... |
Ok... First... On the our main air - base (Bidia), let's see the our position... See the pic given at the left side... Altitude of the our main air - base (Bidia) = 3,550 feet, Coordinates = 1 degree - 47 minutes N and 1 degree - 07 minutes E, Destination WP = 3, Angle = 315 degree, Distance to the destination WP - 3 = 69.2 Nm, Fuel capacity = 1,330 FL... |
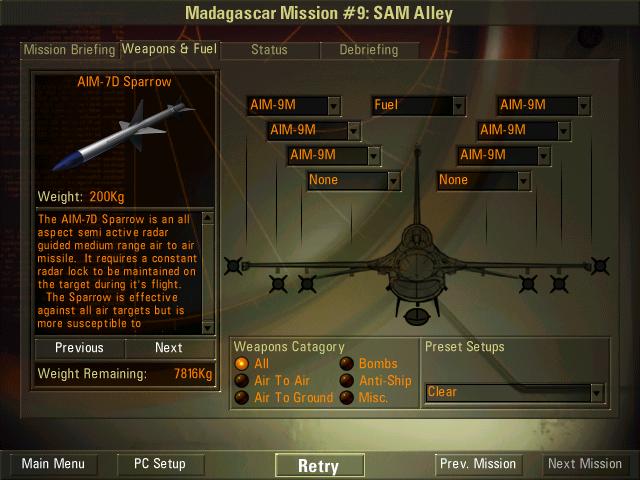
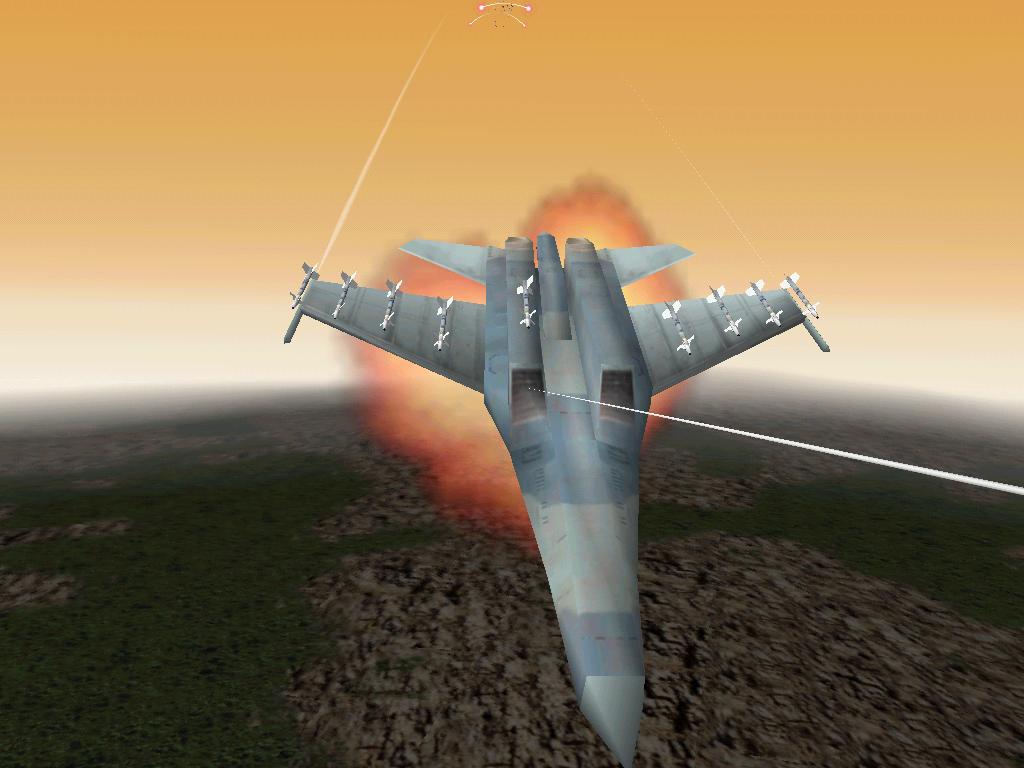
Click on the pic above for larger size... To see the your weapons... |
About the weapons... Get 1 fuel tank and just 6 AIM - 9Ms (You can choose 3 AIM - 9M and 3 AIM - 120 instead)... See the pic given at the left side... But !!! Important notice !!! According to my experience, it would be better to get 5 AIM - 120 and 1 AIM - 9M... Instead, you can get 6 AIM - 120... May be the best... |
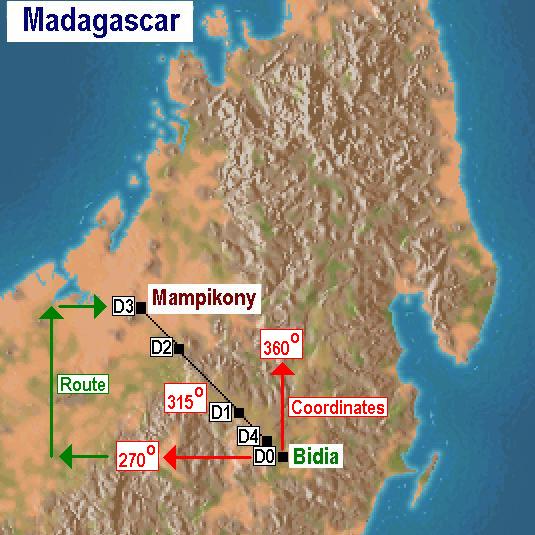
Click on the pic above for larger size... To see the flight directions and angles... |
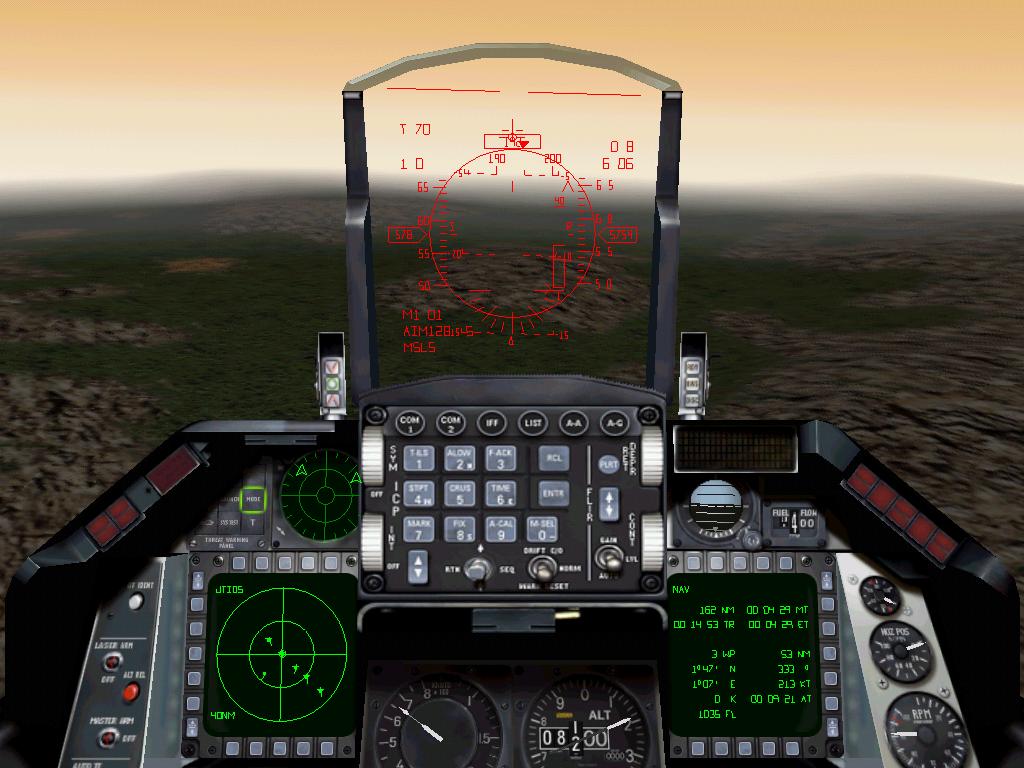
Now... Take off easily... Turn your angle from 315 to 270... By the way, if you want to hunt most of them, turn your angle to 200... After you are flying at an angle choosen by you, set your throttle 60 or 70, depending on your speed... Ofcourse your fuel capacity... Fly directly... Set your radar range at 10 Nm... Just fly... Ok... You can see the flight directions and angles at the pic given at the left side... After a relatively short flight time, you will contact with them at the your radar... Let us play the game !!! |
Click on the pic above for larger size... To see the squadron... |
But, be carefull... Because there are 5 SU - 27 Flankers located at your right side... One of them is just right behind of you... It is separated from the squadron... You can hunt it easily... But !!! There are four more which are flying one after the other... See the pic given at the left side... |
Click on the pic above for larger size... To see the result i had while landing... |
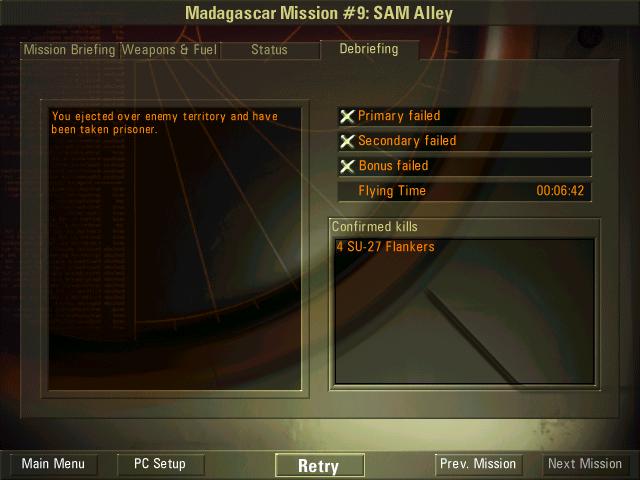
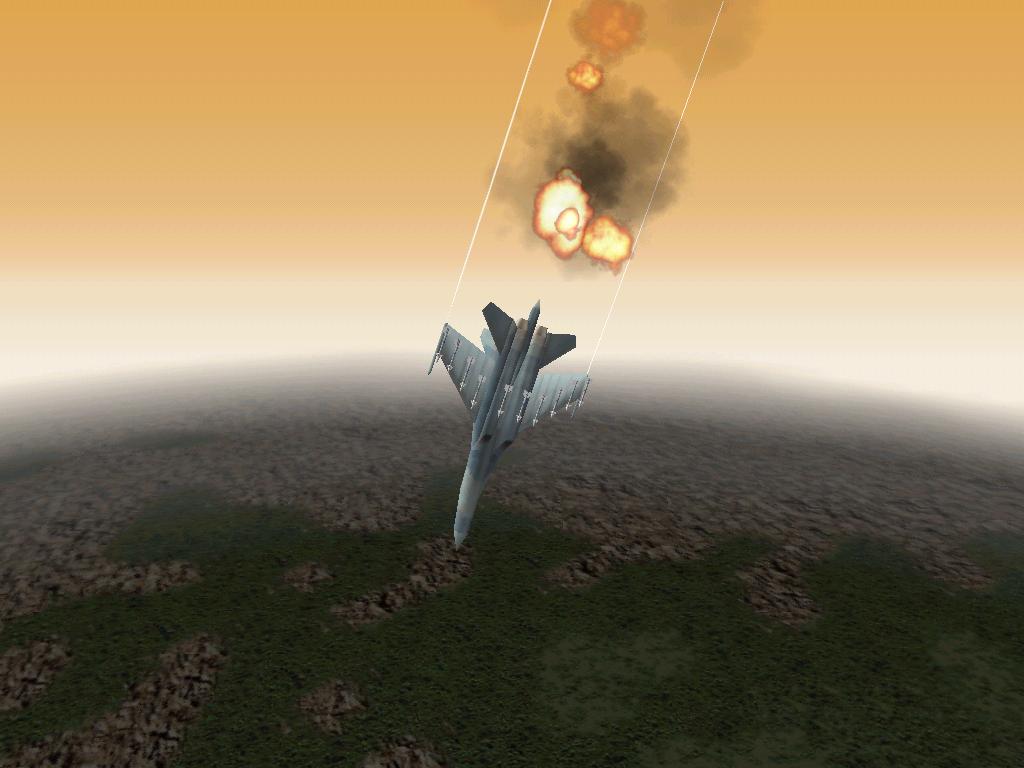
Fire and turn back, rapidly... During these manoeuvres, keep your air - speed at least 500 - 600, may be higher, and also control your fuel capacity, continuously... Then, go for the rest... Do not miss... Then, you will meet the second couple... Flying with the same order... Do it again... And do not miss !!! Never !!! I have missed one, and it followed me until the our main air - base... Because, i had not any air to air missile... I had to rearm... You can see the result by clicking on the pic shown at the left side... Just 4 SU - 27 Flankers... Not enough !!! |

Click on the pic above for larger size... To see the result i had while fighting... |
At the another attempt, i have killed all of them, one by one... You can see the result by clicking on the pic shown at the left side... All of them... 5 SU - 27 Flankers... Do not relax... More enemy aircrafts are still waiting for you... You will see what i mean... Below... |
Click on the pic above for larger size... To see the warning message from the game... |
By the way... You might be warned up and immediately controlled by the game, if you get out of the mission border... It is being especially occured at an angle of 200... It is very dangerous... Like this... Click on the pic shown at the left side... |
Click on the pic above for larger size... To see the result of this strategy... |
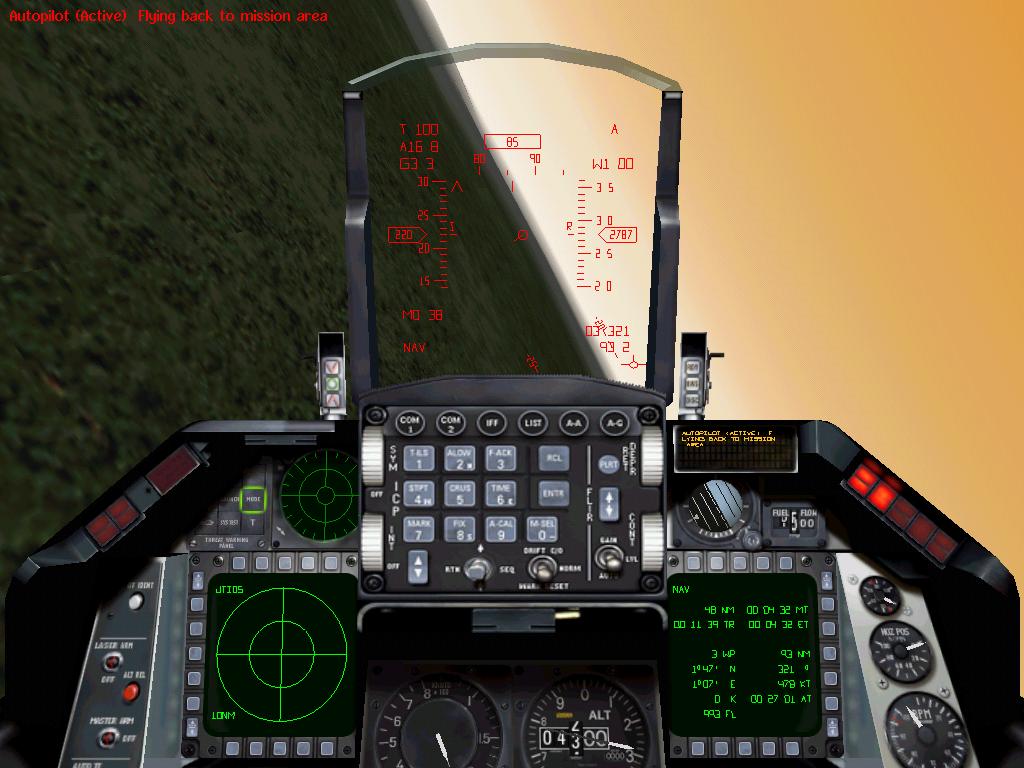
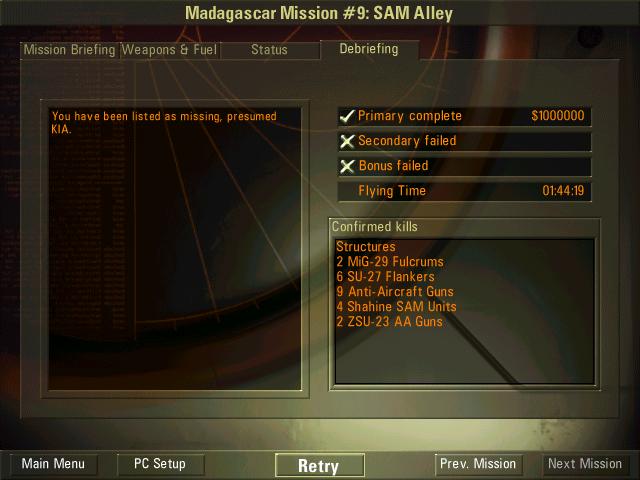
If you can clear this route, there is not any need to fight against the enemy ground forces... I could not still achieved... But, i am trying... I will do it... And i did it... But, on the returning route, i had no more air - to - air missiles... Then, two enemy aircrafts appeared, suddenly... I have tried to escape... No more chance... Click on the pic shown at the left side... To see how the primary objective completed by this strategy... |
Click on the pic above for larger size... To see the result of an another attempt... 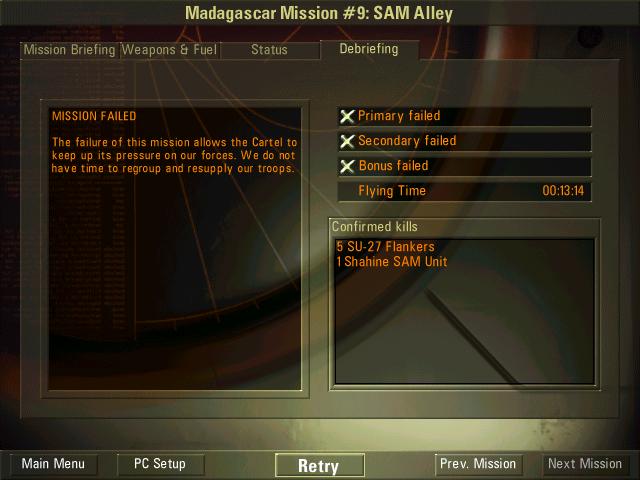
Click on the pic above for larger size... To see the result of an another attempt... |
Here are some important notices : ( 1 ) First, clear the enemy air - base number 4... ( 2 ) Turn around your base to kill out an anti - aircraft gun... It is very dangerous... ( 3 ) It is up to you whether going to the direction of angle of 270 or 200... Because, this game has a dynamic structure... By the way, at the angle of 200 you will be probably warned by the game... ( 4 ) For fighting on the air, set throttle 70, at least... ( 5 ) Then, go back to the our air - base for refueling and rearming... ( 6 ) Get armed with GBU, whatever you want... (I have got 2 x 3 GBU - 12s)... ( 7 ) Go to the enemy building located at the way - point 3 having a throttle of 20, easily... But, sometimes you must change your angle... ( 8 ) First, demolish the enemy radar unit... Then, the ground targets, such as AA and SCUD... Namely, clear the enemy air - base number 3... If you have enough time, kick at the enemy building by using GBUs... ( 9 ) If it is well done, go back to the our air - base located at way - point 0... Set your angle at 200 and your throttle at 20... ( 10 ) At the about 23 Nm distance to the our air - base, turn your angle to 170... |

Click on the pic above for larger size... To see the result of the my tactic No 3... Finally... 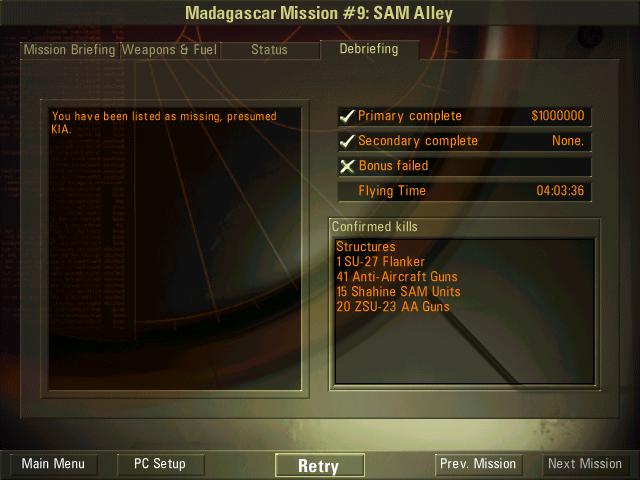
Click on the pic above for larger size... To see the result of the tactic No 1... 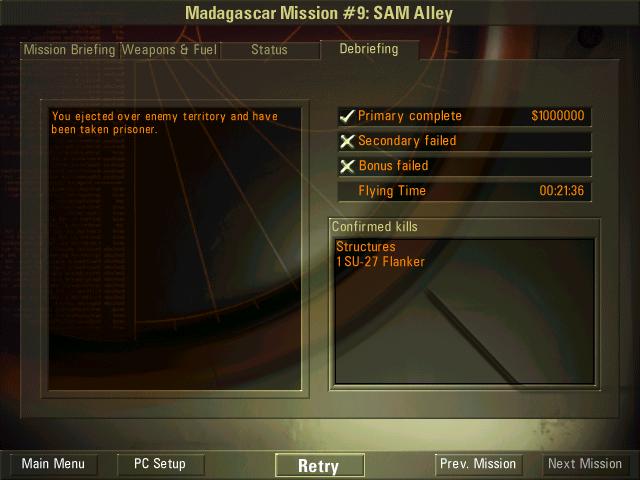
Click on the pic above for larger size... To see the result of the tactic No 2... 
Click on the pic above for larger size... To see the result of the tactic No 3... Again !!! |
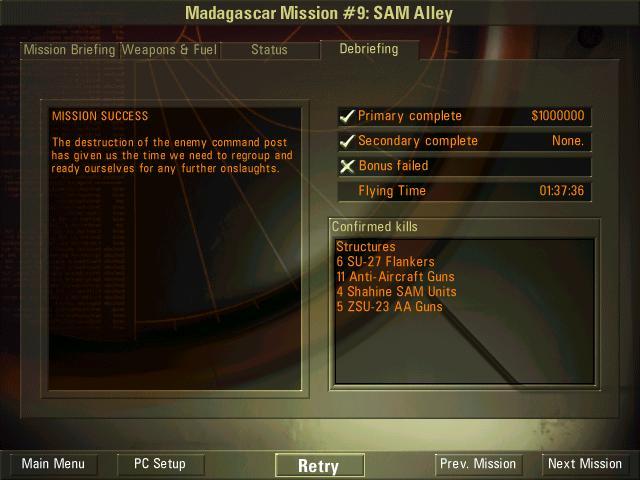
I DID IT !!! No more secondary completed mission ??? :)))))))) How ? First, i have demolished all ground targets located at the WP - 4 for safety landing... For this, i have used 4 AIM - 120s, 2 x 3 AGM - 65 Gs and 2 CBU - 72s... I have rearmed and refueled 3 times... Then, to follow the route explained above, i have got just 4 AIM - 120s to kick of 5 SU - 27 Flankers... You will meet with another 1 SU - 27 Flanker while you are destroying the enemy air - base at WP - 4... By the way, while i was flying having an angle of about 210, the game warned me and then suddenly got control to change my angle to 315... It worked good... It was what i wanted... After i have fired off 5 SU - 27 Flankers, i have gone back to our air - base located at the WP - 0 having an angle of 160 - 170... Then, i have got 4 AIM - 120s, 2 x 3 AGM - 65 Gs and 2 x 3 MK - 82s for the enemy command post... That is it !!! It is not easy in your opinion ? I think it is easy... To demolish the enemy command post, you have 3 alternatives ; ( 1 ) To clear all ground targets starting by the WP - 4, following WP - 1 and WP - 2, and finally WP - 3 (I tried it, but it was very difficult and required more time and patient... At the one attempt, i was so close to the victory... You may see some results at the "Open - Air Mad - 09 Section")... ( 2 ) The second, which was explained at the "Madagascar Mission No.09", at the main menu, is to fly to the WP - 3 directly having and altitude of at least 30,000 ft, escaping from the enemy AAs... It works... But, it was very difficult and required more time and patient... And ofcourse very dangerous... ( 3 ) My tactic... I will show you the flying times and the results of the all alternatives at the left side... Choose one... It is up to you... And good luck again... I DID IT !!! AGAIN !!! No more secondary completed mission ??? :)))))))) As you can see that if you choose the 2nd tactic, flying time is ofcourse will be lower than that of the others... But, you will find yourself in a "bad air traffic defense" :))) |
It belongs to the "Attempt No 56"... Click here to see the result... |

It belongs to the "Attempt No 65"... Click here to see the result... |
