Training # 01 - "Basic Aircraft Handling" From "Kofana"...
MISSION DESCRIPTION...

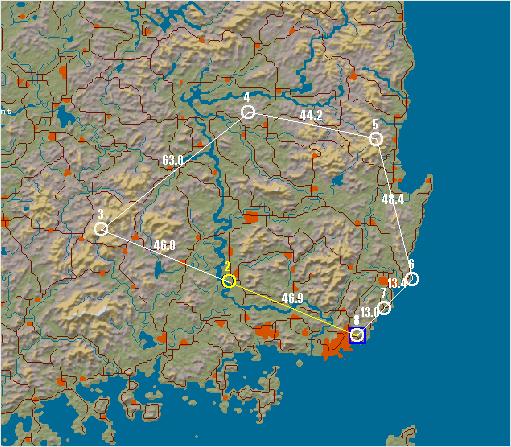
This mission starts with the Falcon in the air. Your goal on this mission is to get used to flying
the jet and using the keyboard to control your various views.
1. Press "Shift + P" to freeze the game. While we are frozen, let's go through the different
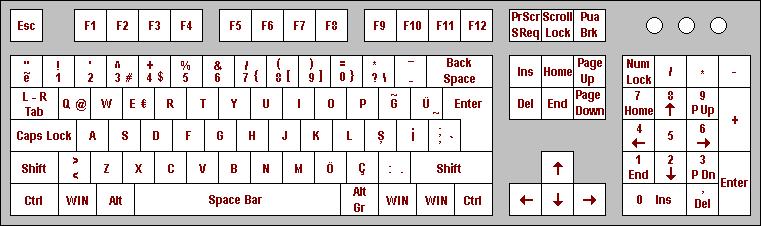
view options. Access the views by pressing the number keys at the top of the keyboard. Press "1"
to switch to the HUD Only view. The MFDs are the boxes visible at the bottom (or top) of the display.
Change the MFD displays by pressing "[" for the left MFD, "]" for the right MFD,
"Shift + [" for the top left MFD and "Shift + ]" for the top right MFD. Press "2"
to put you back in the default 2-D Cockpit view. This view is mouseable, which means that you can use
the mouse to flip switches, turn dials and move around the cockpit. There are three kinds of mouse
pointers that are used in the 2-D cockpit. The red diamond indicates that you cannot interact with a
cockpit control or dial. The green circle means that you can interact with a cockpit control or dial
(by flipping a switch, etc.). The green arrow means that you can click to change your 2-D Cockpit
view to look left, right, etc. Press "3" to enter the Virtual Cockpit. In Virtual Cockpit,
use the hat switch on your joystick or press "W ( Up Arrow )", "Z ( Down Arrow )",
"A ( Left Arrow )" and "S ( Right Arrow )" on the numeric keypad to move your view
around the cockpit. This view is very important because it is very useful in air combat and in
improving your situational awareness or SA. SA is understanding where you are in relation to the
world around you and, just as importantly, understanding where threats are in relation to you.
Practice using the Virtual Cockpit while the simulation is in Freeze mode. If you hold down
"A ( Left Arrow )" or "S ( Right Arrow )", notice that your view will stop near the
ejection seat. Since you cannot see past the ejection seat in the real F-16, Falcon 4.0 has the
same view limitation. You will hear a banging sound when you reach that limit. If you want to
rotate your head (the view) to the other side of the cockpit, press "A ( Left Arrow )"
or "S ( Right Arrow )" on the numeric keypad again and you will move the view to the other
side of the cockpit. Press "~`" to access
the Satellite view, which is an overhead view of the world. To get a closer look at the world,
press "L". Press "L" again to return to normal view. You can also press "7"
and "1" on the numeric keypad to zoom an outside view further in or out. Falcon 4.0 has
additional views, but they will not be needed in this mission.
2. Bring up the 2-D Cockpit by pressing "2". Press "Shift + P" again to unfreeze the
game.
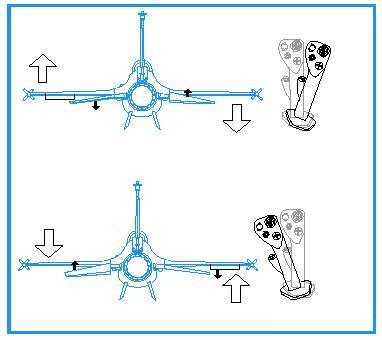
3. Set the RPM gauge to 85% by using the throttle on your joystick or press "+" or "-"
to set the throttle.
4. Move your joystick left to start an easy left turn. Bank the wings to tilt the world about 60
degree and then pull back on the stick until your G meter reads 2.0. Notice that when the wings
are banked, the jet will turn or change heading. In the 2-D Cockpit view, you can watch the HUD
heading scale move and you will see the aircraft banked on the ADI.

5. To keep the aircraft in level flight, ensure that the flight path marker is on the level line
of the HUD. Do this by gently pulling back on the joystick until you get the flight path marker
where you want it. Practice making level turns to the right and left. Turn on the smoke by pressing
"Alt + S" to trace your path through the sky. Use the Satellite view by pressing
"~`" to watch your turns from outside the
aircraft. When you are done, return to straight and level flight. Bank opposite to the direction
you are turning until the HUD 0 degree line is horizontal. Then move the flight path marker until
the horizontal lines of the flight path marker align with the 0 degree line on the HUD.

6. Next, we will practice climbs and descents. To climb, align the HUD flight path marker with
the 5 degree pitch line. Notice that the aircraft starts to climb and that both the cockpit and
HUD altimeters show increasing numbers and that your airspeed decreases (if you don't, add more
power). In addition, the movement of your flight path marker lags slightly behind your control
inputs. After climbing 1,000 feet, level off for a few seconds by aligning your flight path marker
with the level line. Notice that your altitude remains constant with the flight path marker on the
0 degree pitch or level line.
7. Practice a descent by pushing the joystick gently forward to align the flight path marker with
the -5 degree pitch line. Your altitude will now decrease and your airspeed will increase. You
must always manage your energy when flying. Climbs trade airspeed for altitude, whereas descents
trade altitude for airspeed. After descending 1,000 feet, level off by placing the flight path
marker on the HUD level line.
8. After accomplishing level turns and some straight ahead climbs, start combining turns and
climbs together. For example, make a level turn due west, or "27" on your HUD heading tape. When
you are heading west, start a climbing turn to east or "09" on the HUD heading tape. Try to climb
2,000 feet precisely. Set up parameters of your own to practice maneuvering the jet precisely.
9. Next, try doing level turns at low altitude, which is flying below 1,000 feet AGL. During these
maneuvers, experiment with different HUD altitude options (Auto, Bar and Radar). Switch between
these modes by using the mouse to switch to the lower left console in the 2-D Cockpit view. The
HUD control panel on this console is a 3-way toggle switch that selects the HUD altitude options.
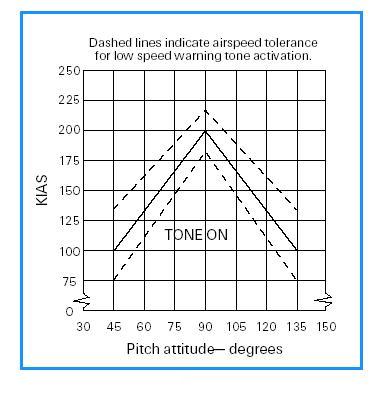
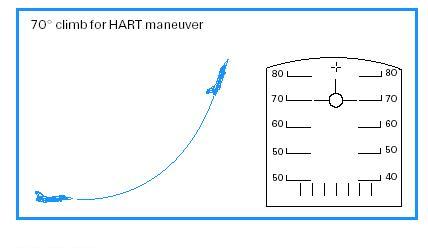
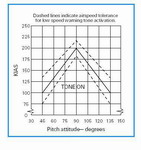
The next series of maneuvers we are going to practice are called HARTs, which stands for "Horn
Awareness Recovery Training." These maneuvers are used to train the pilot to recognize and recover
from a nose high attitude. When the jet is above 45 degree nose high and the airspeed goes below
170 knots, the low speed horn comes on. Actually, it is a combination of pitch (nose relative to
the horizon) and airspeed. You don't have to memorize the chart. Just be aware that if you get
nose high and slow, the horn will come on.
Use the following steps to practice HART maneuvers:
(a) Climb to 15,000 feet and level off. Set the throttle to 85%. (b) Pull hard back on the stick
and start an easy 5 G to 7 G pull-up straight ahead, to set the flight path marker 70 degree nose
high using the HUD pitch ladder. Since the flight path marker will lag the gun cross, use the gun
cross initially to set your pitch. The flight path marker will catch up with the gun cross when
the AOA is reduced. The AOA initially will be high because you are pulling Gs, but it will come
back down as you ease the pull to set your pitch angle at 70 degree.

(c) The horn will come on at
about 170 knots. When you hear the horn, start a roll to inverted flight. Make sure you roll the
aircraft slowly to avoid losing control. Stop the roll when you are upside down. You can tell you
are upside down by looking at the HUD pitch scales. When the vertical legs connected to the ends
of the pitch bars are pointed, up then you are inverted. (d) Once the jet is inverted, start a
smooth pull to get your nose down below the horizon. Once the nose of the jet is below the horizon,
stop pulling on the joystick and let the nose fall through the horizon. Keep the jet inverted
(upside-down). (e) When the airspeed gets to 150 - 200 knots, roll the jet upright and start a 3
G to 4 G pull to level flight (with the flight path marker on the 0 degree pitch line). (f) Try
the exact same procedures except this time pull the nose of the jet up to 90 degree nose high.
Use the Orbit view ("0 key") to watch how the aircraft performs at very low airspeeds.
This first training mission will help you practice controlling the jet using basic cockpit and
HUD symbology. When you have turns, climbs and the HART maneuvers down pat, move on to the next
mission.