|
Oracle® Application Server Adapter for Siebel User's Guide
10g Release 2 (10.1.2) B14062-02 |
|
 Previous |
 Next |
|
Oracle® Application Server Adapter for Siebel User's Guide
10g Release 2 (10.1.2) B14062-02 |
|
 Previous |
 Next |
This chapter contains examples of service and event integration with Siebel.
The service and event scenarios shown depend on the following prerequisites and configuration steps:
Prerequisites
OracleAS Adapter for Siebel installed on Oracle Application Server.
OracleAS Database adapter deployed and configured.
OracleAS Integration InterConnect Adapter Plugin for EIS installed and running.
Configuration Steps
The examples present all the configuration steps necessary for demonstrating service integration with Siebel. The following cross references identify where more information can be obtained.
Configure the OracleAS Adapter for Siebel for services. See Chapter 2, "Configuring Oracle Application Server Adapter for Siebel" for more information.
Configure OracleAS Integration InterConnect iStudio for service interactions. For more information, see the following service and event steps.
See Appendix A, "Using Siebel Workflows" for information on Siebel design requirements.
The following example describes how to create events for Siebel and how to create a channel and a port.
Open Application Explorer.

Perform the following steps:
The Connection dialog box opens, populated with values you entered.
Verify your connection parameters. If required, provide the password.
Right-click the target name and select Connect.
The x icon disappears, indicating that the target is connected.

Expand the Integration Object node and select Sample Account.

Right-click the Sample Account node and select Add IO Node.
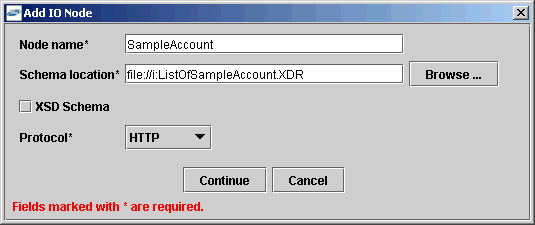
Enter a node name, for example SampleAccount in the Node name field and a path to the Sample Account XDR file in the Schema location field.
Click Continue.
Creating Events for Sample Account
To create events for Sample Account:
Right-click the Sample Account node and select Create Event Port.
The Create Event Port dialog box is displayed.
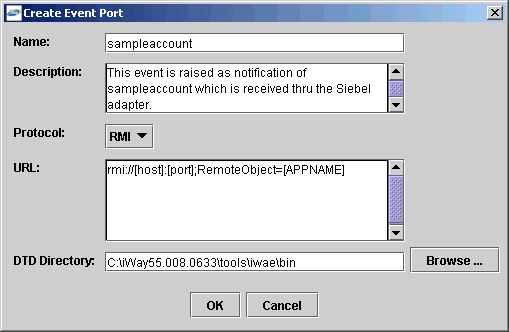
Perform the following steps:
Type a name for the event port and provide a brief description.
From the list, select the required disposition, for example, RMI.
Type the disposition URL.
Type (or browse to) the path containing the DTD directory.
Click OK.
The port appears under the ports node in the left pane.

In the right pane, a table appears that summarizes the information associated with the event port you created.

Creating a Channel
In the left pane, click the Events node.
The ports and channels nodes appear in the left pane.

Right-click Channels and select Add Channel.
The Add Channel dialog box opens.
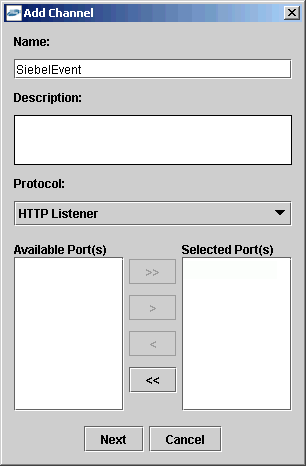
Perform the following steps:
Type a name for the channel, for example, SiebelEvent.
Type a brief description.
From the Protocol list, select HTTP Listener, MQ Series Listener, or File Listener.
Select an event port from the list of available ports. To select more than one, hold down the Ctrl key and click the ports.
To transfer the ports to the list of selected ports, click the double right (>>) arrow button.
Click Next.
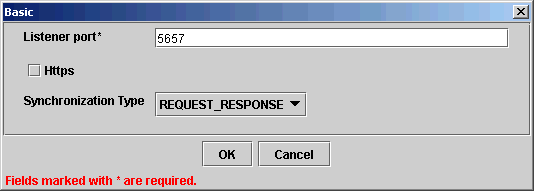
Enter a port number in the Listener port field.
Select REQUEST_RESPONSE from the Synchronization Type drop-down list.
Click OK.
The channel appears under the channels node in the left pane.
An X over the icon indicates that the channel is currently disconnected. You must start the channel to activate your event configuration.

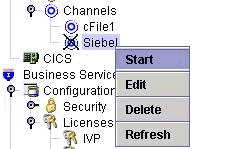
Right-click the channel node and select Start.
The channel you created becomes active.
The X that was over the icon in the left pane disappears.
To stop the channel, right-click the connected channel node and select Stop.
This topic illustrates Siebel event integration. The procedures describe design time and runtime.
The following procedures describe how to start the repository and create a common view and then, publish and subscribe an event.
Starting the Repository
To start the repository, double-click the start.bat file located in the following directory:
D:\oracle\ora92InterCon\oai\9.0.4\repository\start.bat
Creating a Common View
Start Oracle iStudio by double-clicking the start.bat file located in the following directory:
D:\oracle\ora92iStudio\oai\9.0.4\istudio\iStudio.bat
iStudio is started.
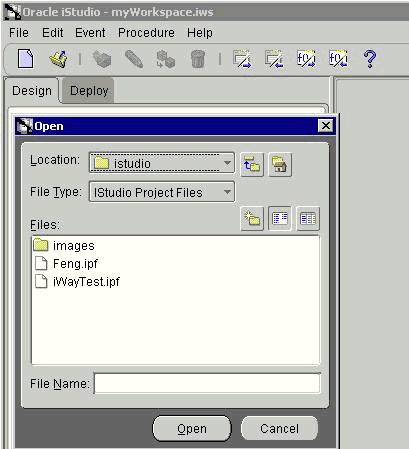
Open a project.
Open Common Views and Business Objects.
Create a Business Object called CustomerFL and a new event under CustomerFL.
|
Note: The event name must be the root element of the DTD generated from Application Explorer. In this example, the root element in the DTD isAccount.
|

Click Import and select XML from the list.

Open the DTD generated from Application Explorer and load it.
The Choose Root Element dialog box is displayed.
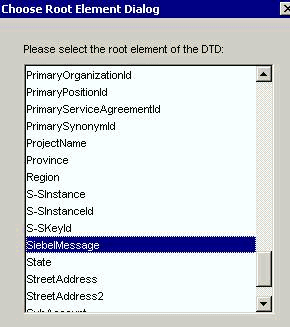
Select the root element, which must be identical to the event name specified earlier.
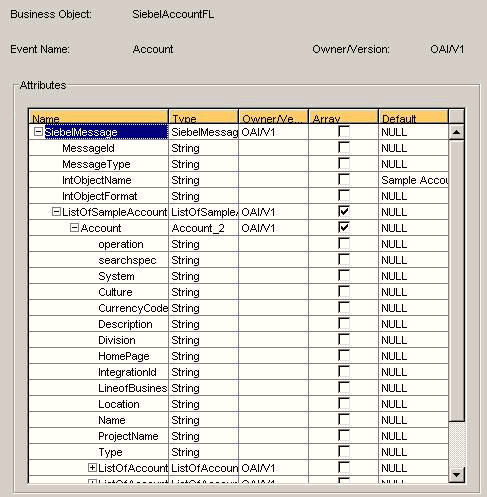
Click Save.
Publishing an Event
Create a new application called SIEBELFL.
Expand SIEBELFL.
Right-click Publish Events and select New.
Select XML as the message type and select Account under the SiebelAccountFL business object as the event.
Click Next.
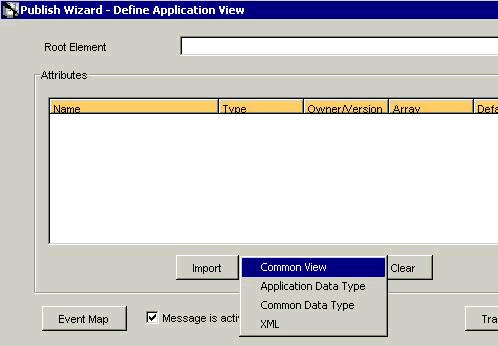
Click Import and select Common View from the list.
The structure from the selected Common View loads.

Ensure you enter the root element of the XML message, for example, SiebelMessage.
Click Next.
Click New to create a mapping between the Common View and Application View.
In this example, the Application View and Common View have the same structure. All the attributes can be mapped by using the ObjectCopy transformation.

Click Apply, OK, and then, Finish.
The application definition for a published event is now complete.
Subscribing an Event
Create a new application called AQAPP.
Expand AQAPP.
Right-click Subscribe Events and select New.
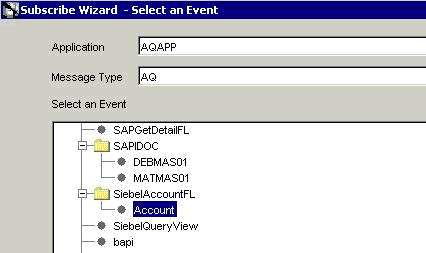
Perform the following steps:
Select AQ as the message type.
Under the SiebelAccountFL business object, select Account as the event.
Click Next.
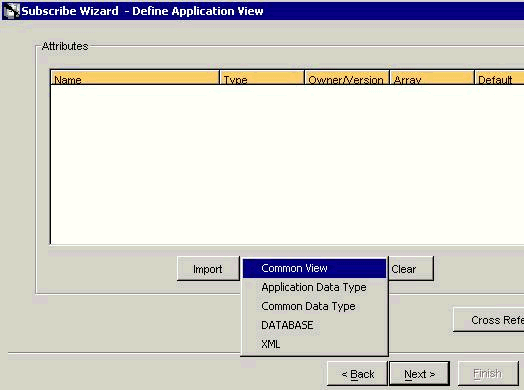
Click Next.
Click New to define mapping between the Application View and the Common View.
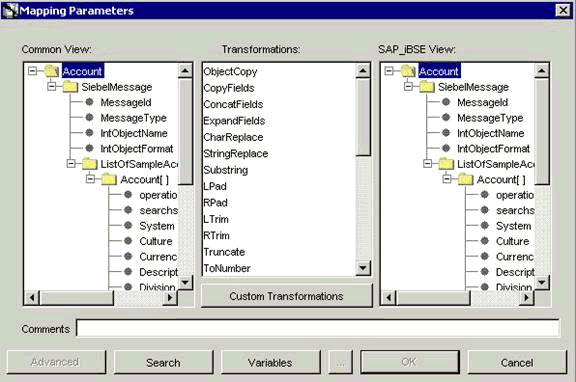
Perform the following steps:
Define the mapping for each field.
After you map each field, click Apply.
When you have finished the mapping process, click OK.
The application definition for a subscribed event is now complete.
The following topic describes how to trigger an event in Siebel to verify event integration using OracleAS Adapter for Siebel.
Verifying Event Integration
Start Oracle Application Server or ensure that the server is running.
Restart OC4J, if required, by executing the following command:
\OracleAS_home\opmn\bin\opmnctl  stopproc process-type=home
\OracleAS_home\opmn\bin\opmnctl  startproc process-type=home
Check the status of OC4J by executing the following command:
\OracleAS_home\opmn\bin\opmnctl status
Start the channel in Application Explorer.
Start the publishing adapter and the subscribing adapter, by executing the following commands:
I:\oracle\ora10gRC3\integration\interconnect\adapters\AQAPP\start.batI:\oracle\ora10gRC3\integration\interconnect\adapters\SIEBELFL\start.bat
Triggering an Event
To trigger an event in Siebel:
Start the Siebel Call Center by entering the following URL in a browser:
http://ariba01/callcenter/start.swe
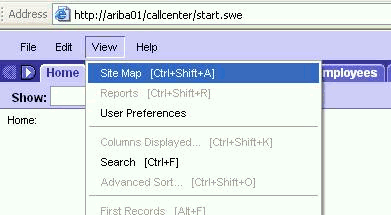
Click View and select Site Map from the list.
The Site Map view is displayed.

Click Siebel Workflow Administration.
The Siebel Workflow Administration page opens.

Click Workflow Processes.
The Workflow Processes page opens.
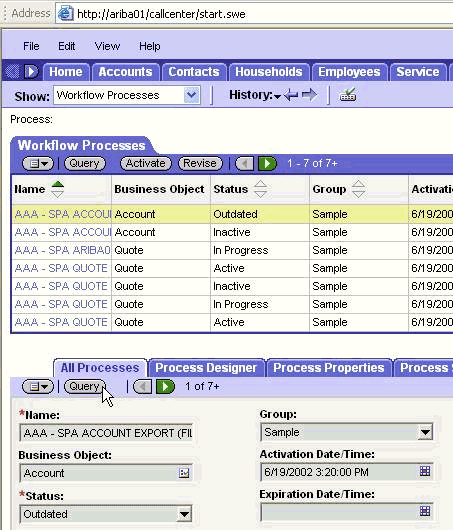
Click Query to search for the Workflow needed to trigger a Siebel event.
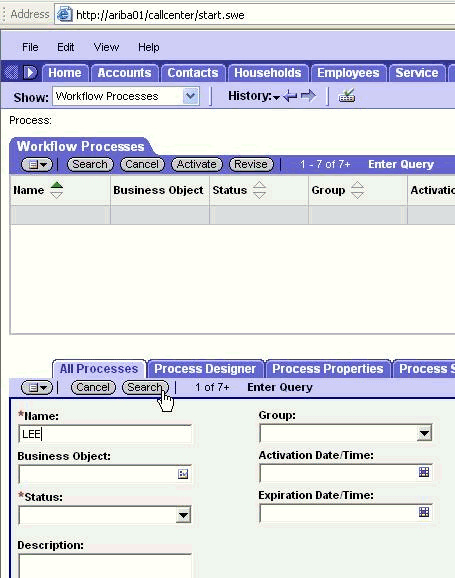
Type a Siebel workflow name and click Search.
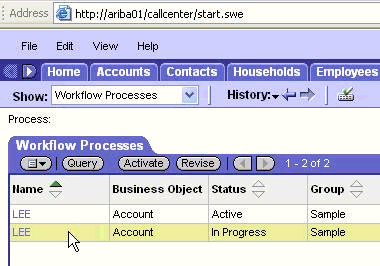
Select the workflow.
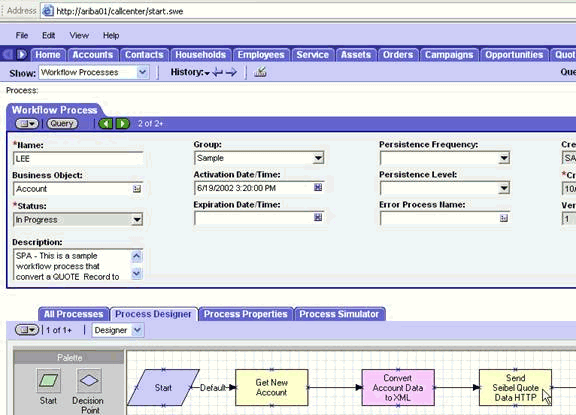
Click the Process Designer tab and double-click the Send Siebel Quote Data HTTP workflow element.
The Input Arguments tab displays.
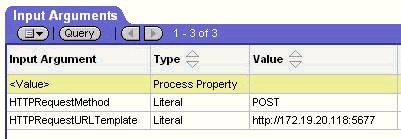
Type the IP address and port for the HTTPRequestURLTemplate input argument.
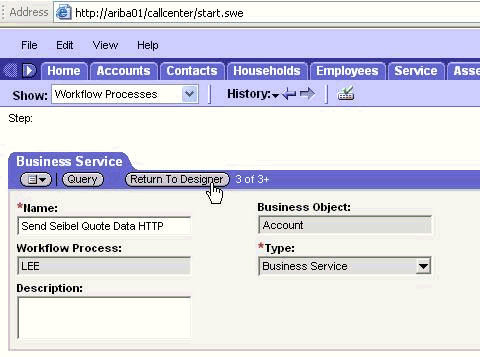
Click Return To Designer.
Click the Process Simulator tab.
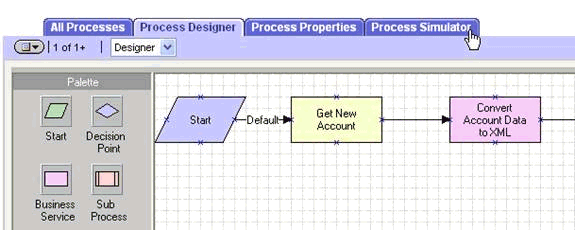
The Simulator tab opens.

Click Start then Continue to complete the Siebel event triggering process.
Verifying Results
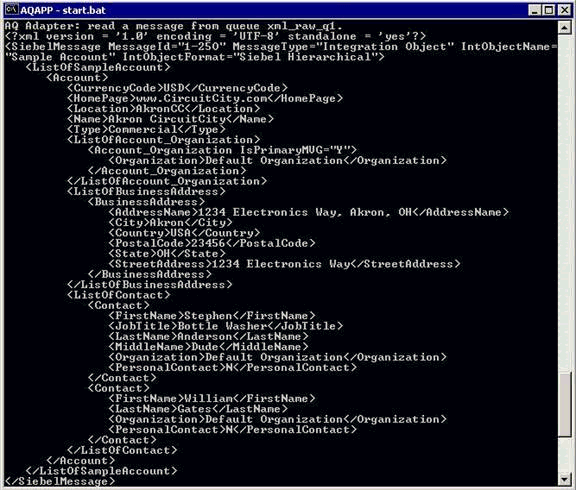
The following section includes a sample publishing adapter (SIEBELFL) console log and subscribing adapter (AQAPP) console log.
Sample Publishing Adapter (SIEBELFL) Console Log

Sample Subscribing Adapter (AQAPP) Console Log
This topic illustrates Siebel service integration. The procedures describe design time and runtime.
The following procedures describe how to start the repository and create a common view and then, define invoked and implemented procedures. Then, it describes how to export PL/SQL code from iStudio.
Starting the Repository
To start the repository, double-click the start.bat file located in the following directory:
D:\oracle\ora92InterCon\oai\9.0.4\repository\start.bat
Creating a Common View
Start Oracle iStudio by double-clicking the start.bat file located in the following directory:
D:\oracle\ora92iStudio\oai\9.0.4\istudio\iStudio.bat

Open a project.
Open Common Views and Business Objects.
Create a Business Object called SiebelQueryView.

Create a new procedure under SiebelQueryView and type SiebelQueryView as the procedure name.
Open the DTD generated from Application Explorer and load it.
Select the root element, Siebel, in this example.
Click OK.
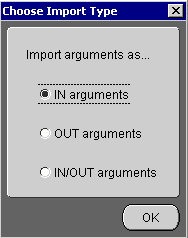
Select IN arguments as the import type for the request DTD and click OK.
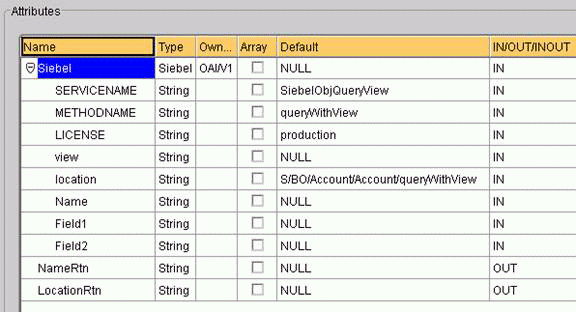
Manually enter all the OUT parameters as shown in the following image.
Select OUT arguments as the import type for the response DTD and click OK.
Creating an Invoked Procedure
To create an invoked procedure:
Create a new application called DBAPP_Siebel.
Right-click Invoked Procedures and select New.
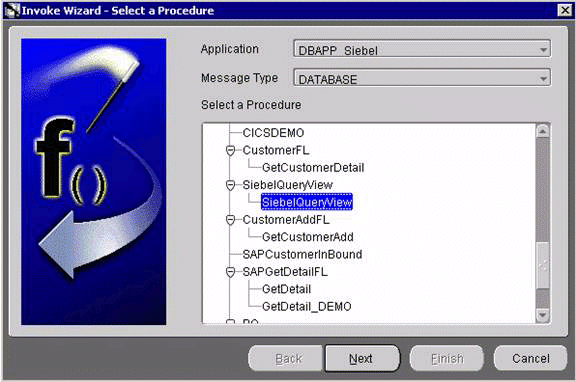
The Invoke Wizard - Select a Procedure window opens.
Perform the following steps:
Click Next.
The Invoke Wizard - Define Application View window opens.
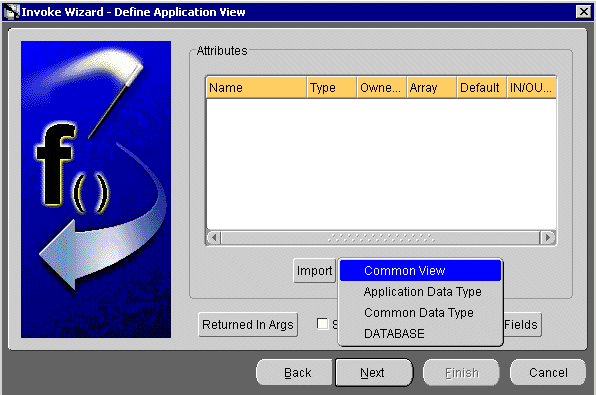
Perform the following steps:
Click Import.
Select Common View.
Information appears in the right pane.
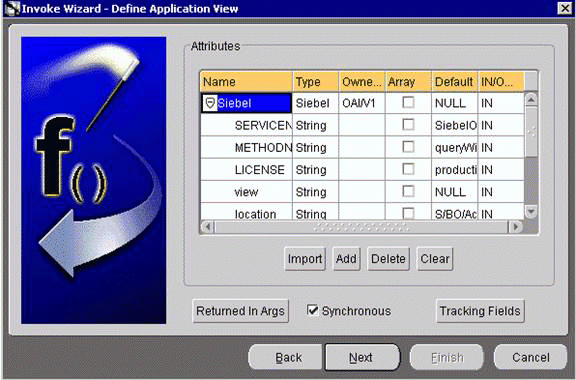
Select the Synchronous check box, as this is a request and a response.
Click Next.
Click New to create a mapping between the Common View and the Application View for the IN parameters.
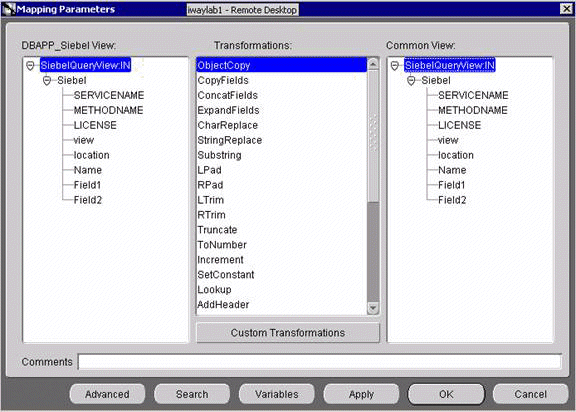
Description of the illustration map_parms.gif
In this example, the Application View and the Common View have the same structure. All the attributes can be mapped by using ObjectCopy Transformation.
Click Apply and then, OK.
Click Next.
Use ObjectCopy Transformation to map the attributes between Application View and Common View for the OUT parameters.
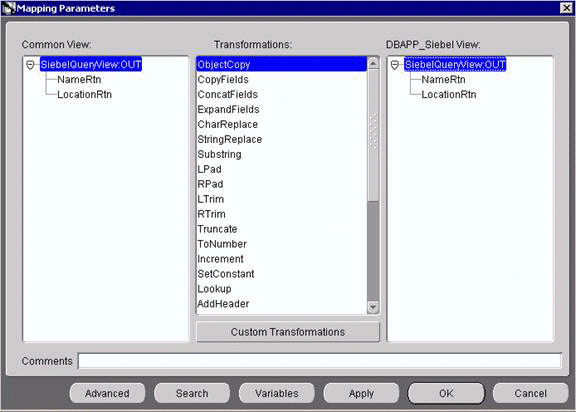
Click Finish.
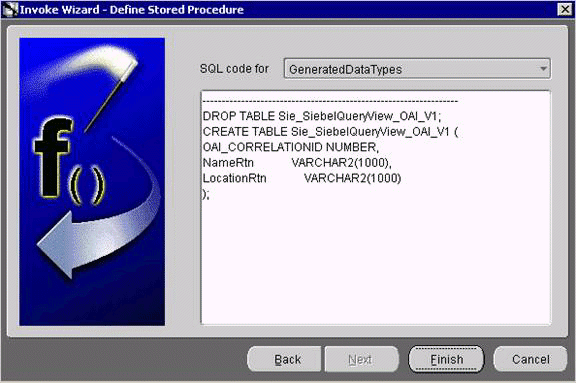
The application definition for the invoked procedure is now complete.
Defining an Implemented Procedure
To define an implemented procedure:
Create a new application called SiebelQuery_FL.
Expand SiebelQueryView.
Right-click Implemented Procedure and select New.
The Implement Wizard - Select a Procedure window opens.

Perform the following steps:
Click Next.
Perform the following steps:
Import the request and response DTDs into iStudio.
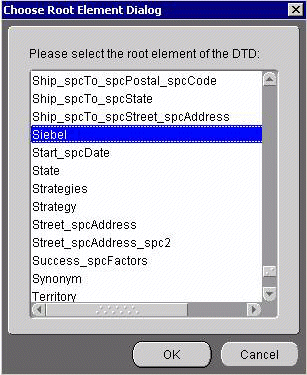
Select Siebel as the root element of the request DTD.
The Choose Import Type dialog box is displayed.

Select IN arguments as the import type for the request DTD and click OK.
The Implement Wizard - Define Application View window opens.
Type the root element of the request DTD in the Object Name field, if it is not automatically populated after importing the request DTD and click Import.
The Choose Root Element dialog box opens.

Select SiebelResponse as the root element and click OK.
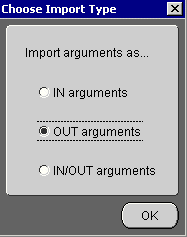
Select OUT arguments as the import type for the response DTD and click OK.
Both the request and response DTDs are now imported into iStudio.
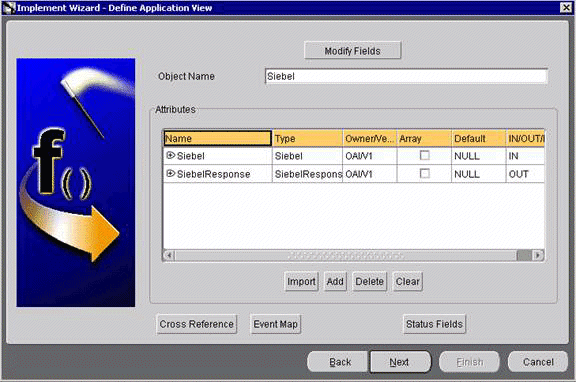
To define a mapping between the Application View and the Common View, click Next and then, New.
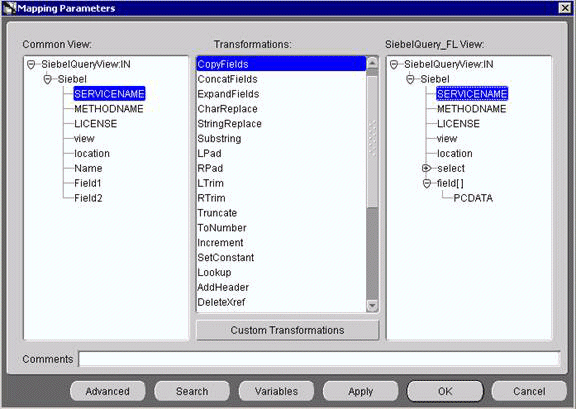
Click Apply and then OK.
When complete, your mapping should look similar to the following example.

To define the mapping for the OUT arguments, click Next.
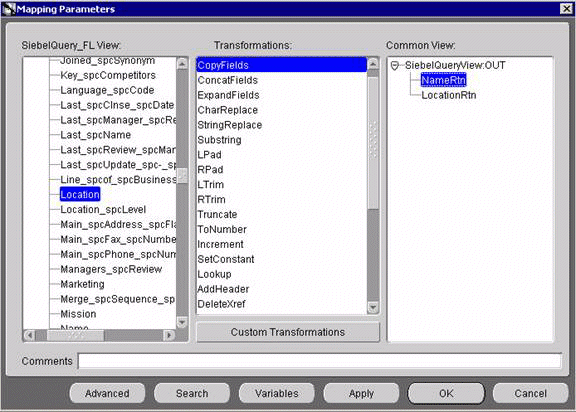
To complete the definition of the implemented procedure, click Next and then, Finish.
Exporting PL/SQL Code from iStudio
You must export the PL/SQL code created in "Defining an Implemented Procedure" and execute it against the appropriate schema. In this example, the schema used is DBAPP_Siebel.
To export PL/SQL code from iStudio:
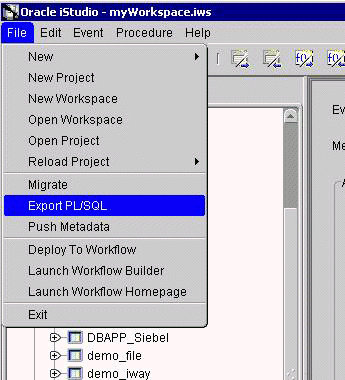
In iStudio, click File and Export PL/SQL.
The Export Application dialog box is displayed.
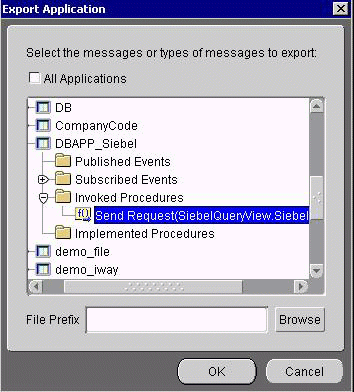
Perform the following steps:
Select the application from which to export PL/SQL.
Type or browse to the file prefix (path to the application).
Click OK.
In this example, two SQL scripts are created:
DBAPP_Siebel_SiebelQueryViewTYPES.sql
DBAPP_Siebel_SiebelQueryView.sql
Log on to the database with the appropriate privileges (in this example, DBAPP_Siebel) and execute the following in the order given:
DBAPP_Siebel_SiebelQueryViewTYPES.sql
DBAPP_Siebel_SiebelQueryView.sql
Create another stored procedure, SIEBELQUERYVIEW_EXE, in the same schema. It executes at runtime to create the database message that is sent to the hub.
CREATE OR REPLACE  PROCEDURE "DBAPP_SIEBEL"."SIEBELQUERYVIEW_EXE"
    (
servicename LONG,
methodname  LONG,
license     LONG,
viewmode    LONG,
location    LONG,
name        LONG,
field1      LONG,
field2      LONG
)
AS
  moid NUMBER;
  aoid NUMBER;
  coid NUMBER;
  siebelid NUMBER;
  namertn LONG;
  locationrtn LONG;
BEGIN
  SiebelQueryView.crMsg_SiebelQueryView_OAI_V1(moid, aoid);
  siebelid := SiebelQueryView.cr_Siebel_Siebel(servicename,methodname,license,viewmode,location,name,field1,field2,moid,aoid);
  coid := SiebelQueryView.inv_SiebelQueryView_OAI_V1(moid,'DBAPP_Siebel','',namertn,locationrtn);
  insert into customer
  (customerid,address)
  values
  (namertn,locationrtn);
  COMMIT;
END;
Editing the adapter.ini File
Open the adapter.ini file.
Add the following two lines to adapter.ini for the adapter:
// Bridge class
bridge_class=com.iwaysoftware.iwbridge.IWBridge

// IBSE URL
ibse_url=http://hostname:7777/ibse/IBSEServlet/XDSOAPRouter
Where hostname is the URL of the server and 7777 is the port number.
The following topic describes how to verify service integration using the OracleAS Adapter for Siebel.
Verifying Service Integration
To verify service integration:
Start the Oracle Application Server or ensure that the server is running.
Restart OC4J, if required, by executing the following command:
\OracleAS_home\opmn\bin\opmnctl  stopproc process-type=home
\OracleAS_home\opmn\bin\opmnctl  startproc process-type=home
Check the status of OC4J by executing the following command:
\OracleAS_home\opmn\bin\opmnctl status
Invoke and implement the adapter by executing the following commands:
\InterConnect_HOME\oai\9.0.4\adapters\ SiebelQuery_FL\start.bat
\InterConnect_HOME\oai\9.0.4\adapters\DBAPP_Siebel\start.bat
Log on to SQL*Plus with DBAPP_Siebel and execute the following command:
exec
siebelqueryview_exe('SiebelObjQueryView','queryWithView','production','AllView',
'S/BO/Account/Account/queryWithView','SIEBEL2 ACCOUNT','Location','Name');
The following image shows the SiebelQuery_FL example. It receives a reply from Siebel and returns the reply to the hub.
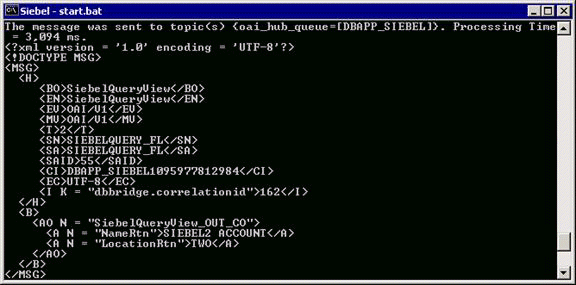
The following image shows the DBAPP_Siebel example. It receives a reply from the hub and writes the data to the database table.
