|
Oracle® Application Server Integration InterConnect User's Guide
10g Release 2 (10.1.2) B14069-02 |
|
 Previous |
 Next |
|
Oracle® Application Server Integration InterConnect User's Guide
10g Release 2 (10.1.2) B14069-02 |
|
 Previous |
 Next |
This chapter describes the infrastructure tasks in iStudio. It contains the following topics:
Enabling Infrastructure provides additional important features that are critical to enable an end-to-end integration. These features include:
Content Based Routing. Route messages by building business rules based on message content. For example, a procurement system routes fulfillment requests to different fulfillment centers based on an originating location.
Content based routing can be done for both events and procedures. The adapter that publishes an event or invokes a procedure, evaluates the content based routing rules to determine the recipient list. This recipient list is then added to the JMS header for the message before it is sent to the OracleAS Integration InterConnect hub. In the hub, AQ looks up the recipient list and wakes up the relevant target adapters.
|
Note: When defining content based routing rules, make sure that all routing cases are covered for all possible values of the fields used in the rule. Once you define even one content based routing rule, the default event based routing rules are no longer in effect. |
Domain Value Mapping. Map code tables across systems. For example, a purchase order in a procurement system has a PO Status field with domain values Booked and Shipped. The corresponding field in a fulfillment system has the domain values 1 and 2. OracleAS Integration InterConnect enables the user to create mappings such as booked=1, shipped=2 so that it can correlate these values at run time without each system understanding the domain value set of the other system.
Cross Referencing. Correlate keys that uniquely identify the entities in one application with corresponding entities created in other applications. For example, a purchase order created in a procurement system has a native ID X. The purchase order is then routed to a fulfillment system, where it is created with native ID Y. As a result, X and Y must be cross-referenced for OracleAS Integration InterConnect to correlate communication about this same logical entity in two different systems without each system understanding the native ID of the other system.
To modify content-based routing for an event or procedure:
Right-click the event or procedure under the Content Based Routing node in the Design Navigation list, and then click Edit. The Content Based Routing Rules dialog box is displayed.

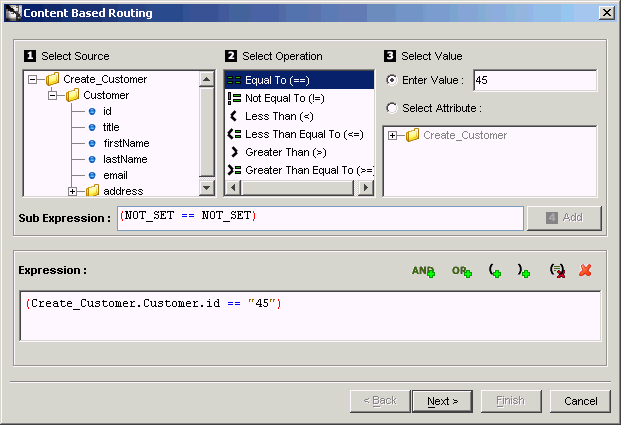
Click New. The following Content Based Routing dialog box is displayed.

Perform the following:
Select the source event attribute to be used for building rules from the Select Source list.
Select an operator from the Select Operation list.
For literal values, enter a value in the Enter Value field. For attributes, select an attribute from the Select Attribute list. Use Select Attribute to compare one value in an attribute to another. An attribute can be selected either from the message payload (common view data) or the message header that accompanies this payload.
Click Add.
You can add to the condition by using the AND and OR operators. To add to a rule, click Append "(" to expression button. This can be used to build complex routing rules such as Age<50 AND Salary>100000 OR AGE >=50.
Figure 6-1 Creating Content Based Routing
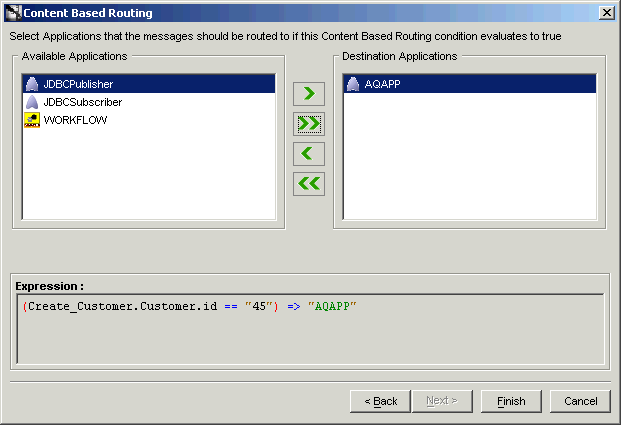
Click Next. The Content Based Routing dialog box is displayed.
Select one or more applications from the Available Applications list and click the right arrow button.
Click Finish. The content based routing Rule is created, and it is displayed in the Content Based Routing dialog box.
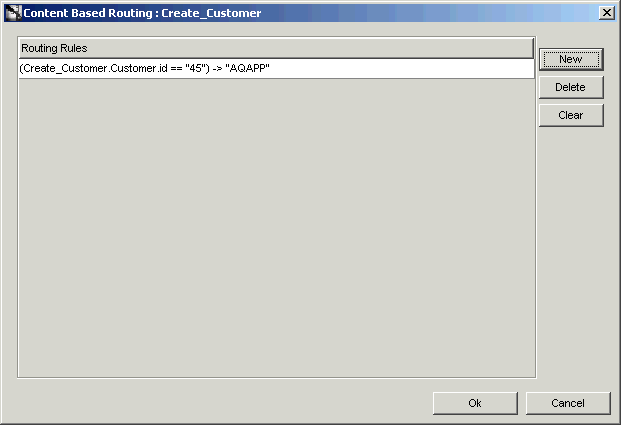
Click New to add another rule or click Ok to finish.
To create a domain value mappings table:
In iStudio, right-click Domain Value Maps under Enabling Infrastructure.
Select New. The Create Domain Value Mapping Wizard is displayed.
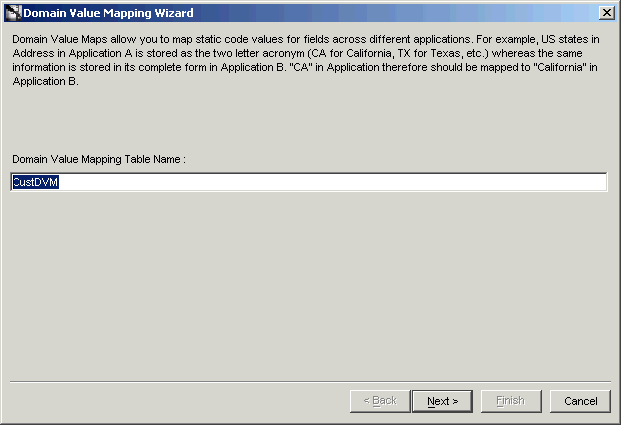
Enter a name for the domain value map in the Domain Value Map Table Name field.
Click Next.
Select an application name from the Available Applications list, as shown in .
Figure 6-2 Adding Applications to a Domain Value Mapping
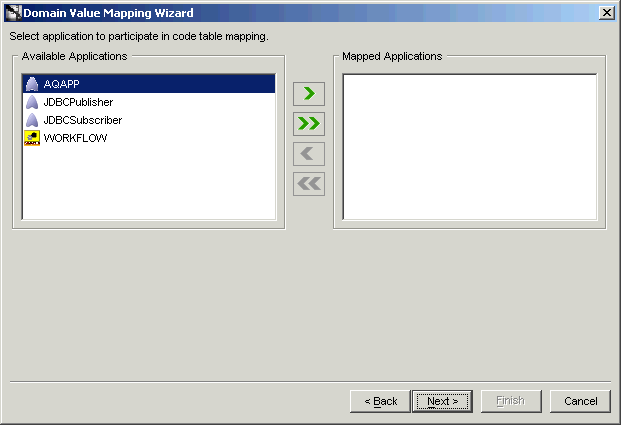
Click the right arrow button to add the selected application to the Mapped Applications list.
Click Next.
Click Add to add mappings, or Import to import mappings, as shown in .
Figure 6-3 Adding or Importing Mappings to a Domain Value Mapping
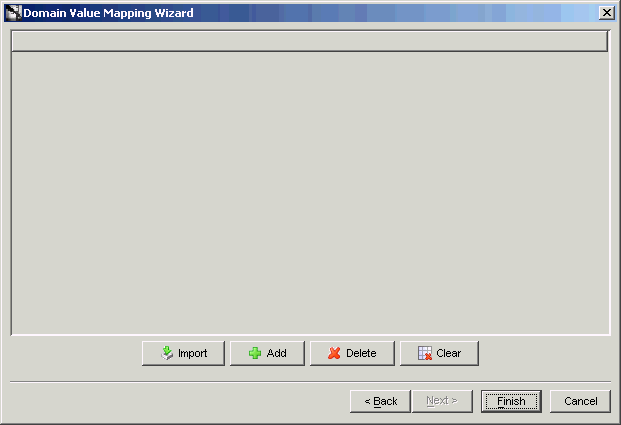
Click Finish.
To add applications to domain value mappings:
In the Design Navigation list, right-click a domain value mapping.
From the context menu, select Add Application. The Domain Value Mapping Wizard is displayed as shown in .
Select an application name from the Available Applications list.
Click the right arrow button to add the selected application to the Mapped Applications list.
Click Finish.
To remove applications from the domain value mappings:
In the Design Navigation list, right-click a domain value mapping.
From the context menu, select Remove Application. The Domain Value Mapping Wizard is displayed.
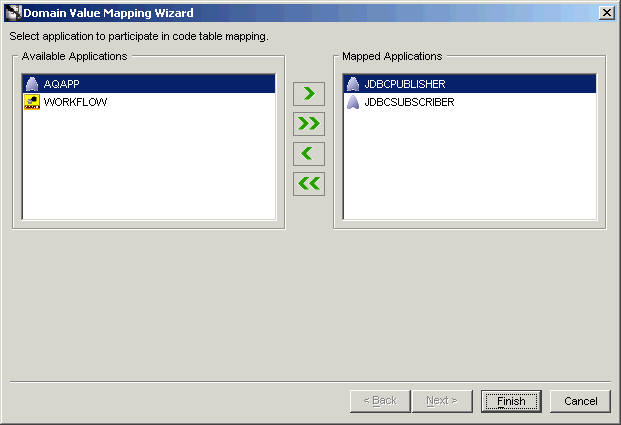
Select the application name to remove from the Mapped Application list.
Click the left arrow button.
Click Finish.
To modify data domain value mappings:
In the Design Navigation list, right-click a domain value mapping.
From the context menu, select Edit Values. The Domain Value Map Wizard is displayed.

Description of the illustration 6_11.gif
Click Add to add mappings, or Import to import mappings.
Click Finish.
To delete a selected domain value mapping:
Select the domain value mapping to be deleted.
Click Delete.
To delete a domain value mapping table:
Select the domain value mapping table to be deleted and right-click.
From the context menu, select Delete.
Click Yes in the Confirm Delete dialog box.
Creating a cross-reference in iStudio creates a table in the repository schema. To create a cross-reference table:
In iStudio, right-click Cross Reference Tables under Enabling Infrastructure.
Select New. The Cross Reference Wizard is displayed.
Enter a name for the cross reference table in the Cross Reference Table Name field.
Click Next.
Select an application name from the Available Applications list.
Click the right arrow button to add the selected application to the Mapped Application list.

Click Finish.
To add applications to a cross-reference table:
In the Design Navigation list, select a cross-reference table and right-click.
From the context menu, select Add Application. The Cross Reference Wizard is displayed.
Select an application name from the Available Applications list.
Click the right arrow button to add the selected application to the Mapped Applications list.
Click Finish.
To remove applications from a cross-reference table:
In the Design Navigation list, select a cross-reference table and right-click.
From the context menu, select Remove Application. The Cross Reference wizard is displayed.
Select the application name to be removed from the Mapped Applications list.
Click the left arrow button.
Click Finish.
To populate cross-reference tables, returned arguments must first be defined.
Use the Subscribe Wizard to access the correct dialog box for populating cross-reference tables.
To populate cross-reference tables:
Click Cross Reference in the Define Application View dialog box. The XRef dialog box is displayed.

The Application Returned Arguments box displays the returned arguments. This information is initially populated with the OUT arguments from the application view.
Click Modify Returned Arguments to modify the returned arguments list.
Select corresponding attributes in the Application Returned Arguments For XRef and Common View boxes, then click Map. The Cross-reference Table dialog box is displayed.
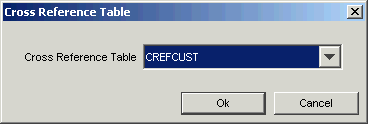
Specify the cross reference table name to be populated using these attributes values.
Click OK.