|
Oracle® Application Server Adapter for PeopleSoft User's Guide
10g Release 2 (10.1.2) B14060-02 |
|
 Previous |
 Next |
|
Oracle® Application Server Adapter for PeopleSoft User's Guide
10g Release 2 (10.1.2) B14060-02 |
|
 Previous |
 Next |
This appendix describes how to create new and modify existing component interfaces for use with OracleAS Adapter for PeopleSoft. It also describes how to apply security to those component interfaces and how to test them.
You can:
Use component interfaces supplied by PeopleSoft with your application.
Component interfaces also are known as Enterprise Integration Points (EIP).
Modify an existing component interface.
Create a new component interface.
Before using your component interface you must apply security to it and test it.
After securing and testing a component interface, you must generate its API, see Appendix A, "Generating Component Interface APIs" for more information.
|
Note: This section is intended as a helpful supplement; it is not a substitute for PeopleSoft documentation. For complete and up-to-date information about PeopleSoft component interfaces, see the PeopleSoft Online Library for your PeopleSoft system. |
You create component interfaces using the PeopleSoft Application Designer. For more information about Application Designer, see your PeopleSoft documentation.
You can add properties from the records in the component view. You can delete a property in the component interface that you do not want to expose. You can rename properties by clicking the property and then clicking again until you can enter a new name. If you rename a property, it can be referenced in the component interface only by the new name, not by the underlying component name.
Properties may have various icons adjacent to them. For example, EMPLID has an icon indicating that it is a key field from the underlying record. NAME has an icon indicating that it is an alternate key field from the underlying record. For a complete list of property icons, see the PeopleBooks documentation.
To create a component interface:
Open the PeopleSoft Application Designer.
Select New from the File menu.
The New dialog box is displayed.

Perform the following steps:
Select Component Interface.
Click OK.
The Select Source Component for Component Interface dialog box is displayed.
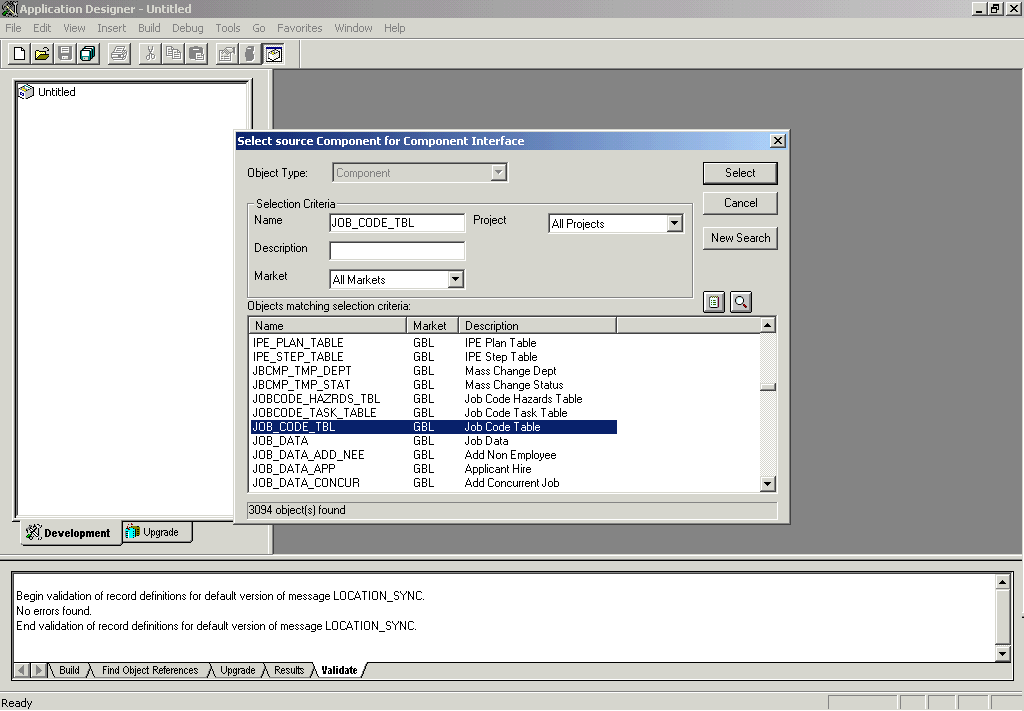
Highlight the component to use as a basis for the component interface and click Select.
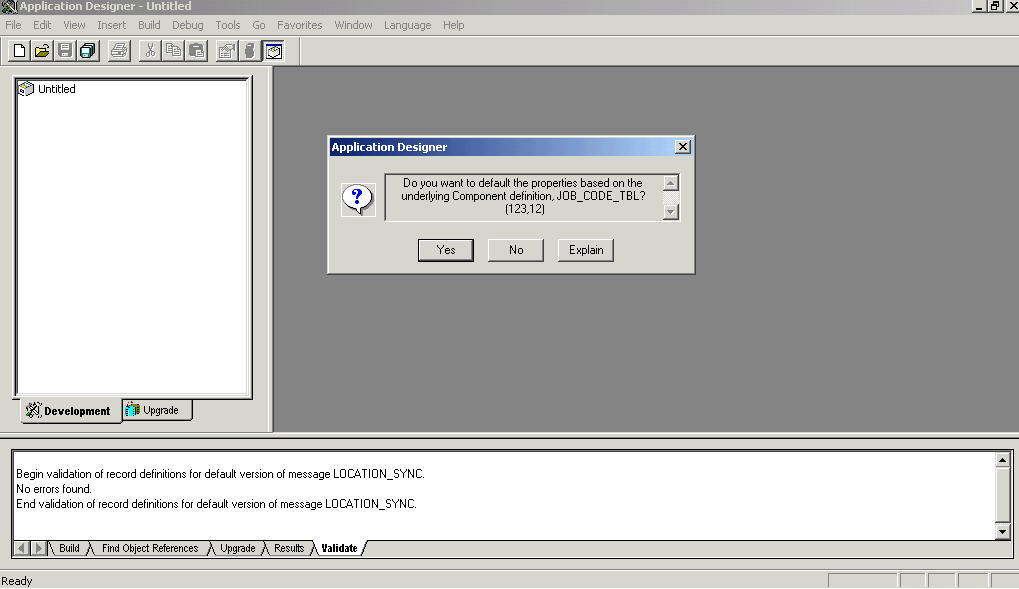
The Application Designer dialog box is displayed.
|
Note: If the component interface is large, expose the component properties manually. |
To create the component interface without displaying properties and to expose component properties manually, click No.
Perform the following steps:
Drag the relevant fields from the left pane to the right pane.
To select various functions to perform, right-click either the right or left pane, depending on which pane is active.
For a complete list of functions, see the PeopleBooks documentation.
To create the component interface and display the properties of the underlying component interface, click Yes.
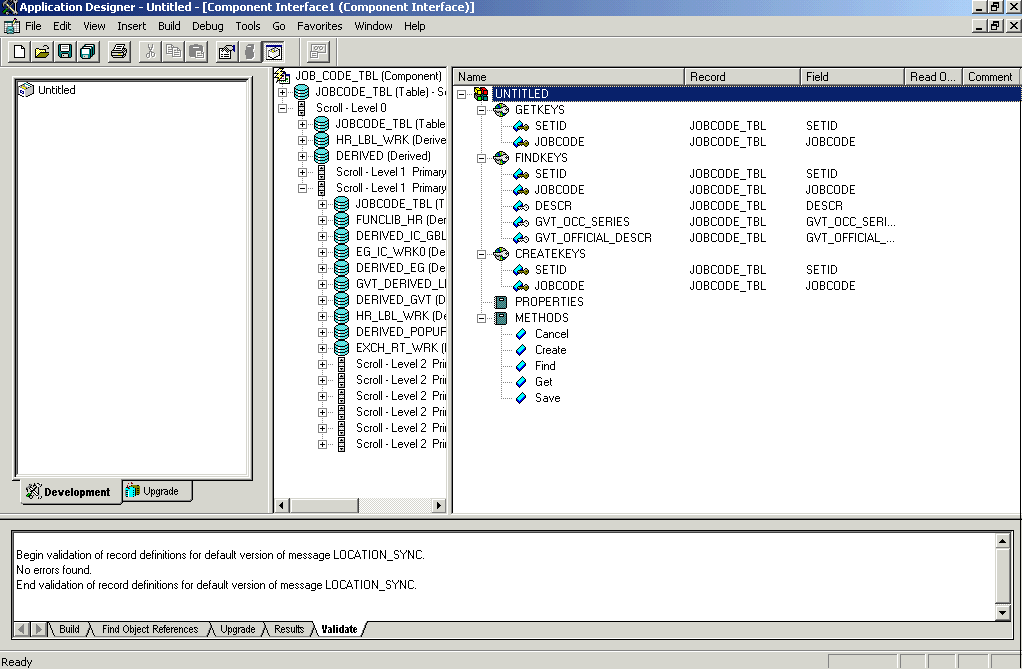
Standard Methods
The standard methods for the component interface are:
Create
Find
Get
Save
Only those methods in the underlying component are available. For example, if the underlying component does not contain Add capabilities, Create is not available.
To view or change available methods:
Display the Component Interface Properties dialog box.

Click the Standard Methods tab.
Select the desired methods.
You must set up security for the component interface before you can begin testing.
The following procedure describes how to configure component interface security for PeopleSoft Version 8.1 in 2- and 3-tier mode.
To configure component interface security:

From the Use menu, select Permission Lists, Component Interface, and then click Update/Display.
The Permission Lists dialog box is displayed.
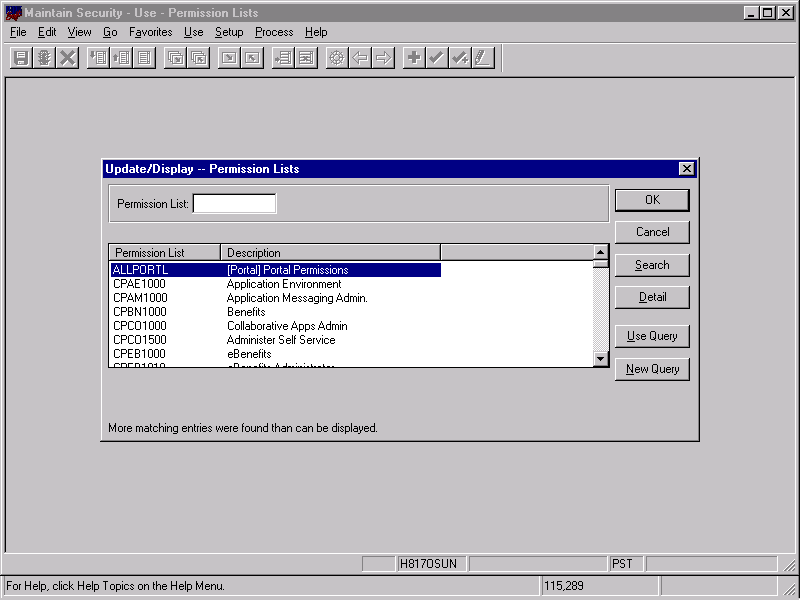
Description of the illustration i_updatedisplay.gif
Before Security can be set, you must identify the permission lists.
Select the relevant permission list and click OK.
For more information on permission lists, see the PeopleBooks documentation.
The following pane is displayed.
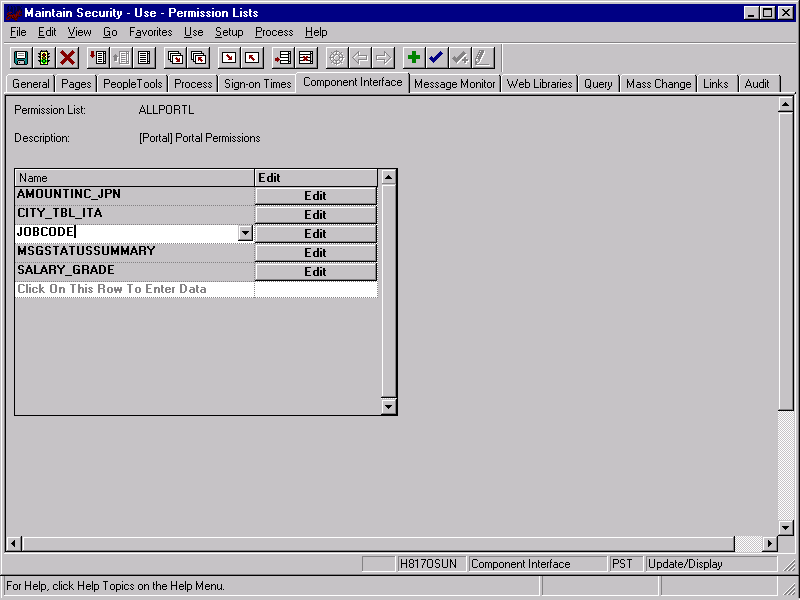
Insert the new component interface that you created.
Click Edit.
When you select the component interface, all available methods appear, including user-defined methods. This enables you to specify whether this particular Permission List must have full or partial access.
In the following example, the ALLPORTL Permission List has full access to all methods.
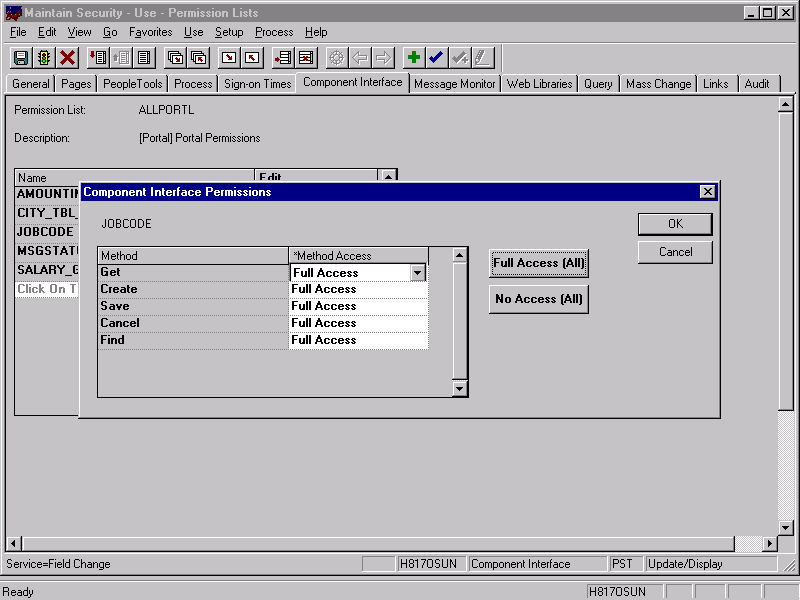
Select the desired level of access.
Click OK.
The following procedure describes how to configure component interface security for PeopleSoft Version 8.4 or higher.
To configure interface security:
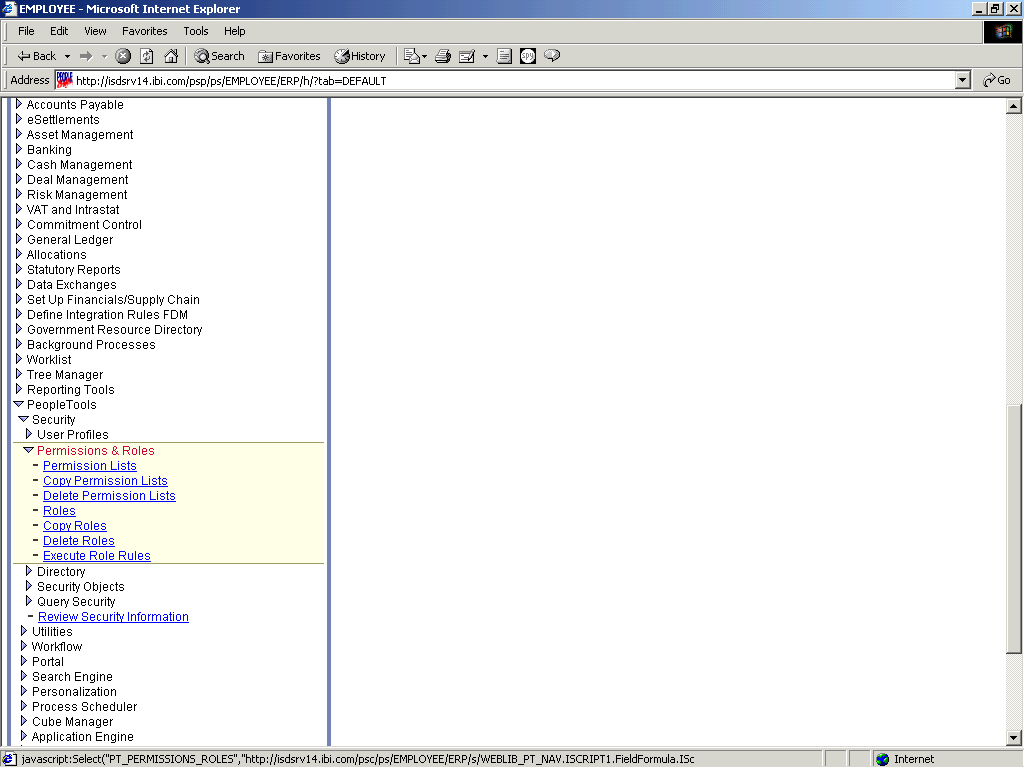
Expand PeopleTools, Security, User Profiles, and Permissions & Roles and then click Permission Lists.
Click Search.
The Permission Lists Search pane is displayed.
Select the relevant permission list.
The following pane is displayed.

Click the right arrow next to the Sign-on Times tab.
The Component Interfaces tab appears.

Click the Component Interfaces tab.
Click + to add a new row to the Component Interfaces list.
A field appears where you can enter the component interface name.
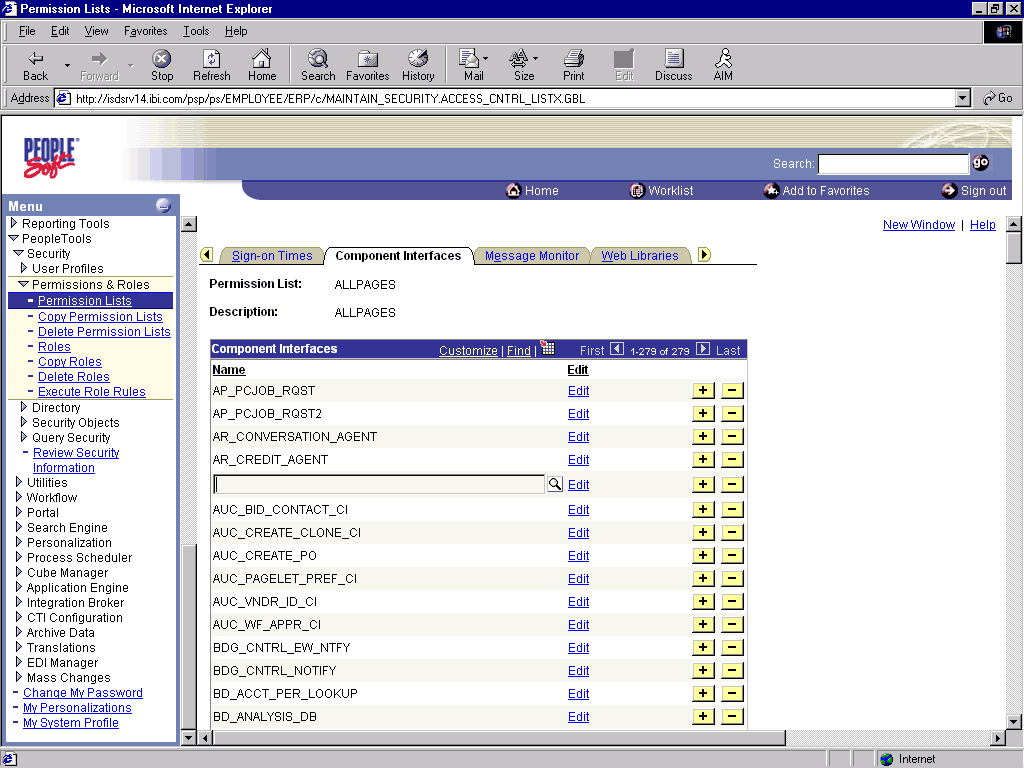
Enter the component interface name and click Edit.
This example uses the component interface AR_ITEM_AGENT.
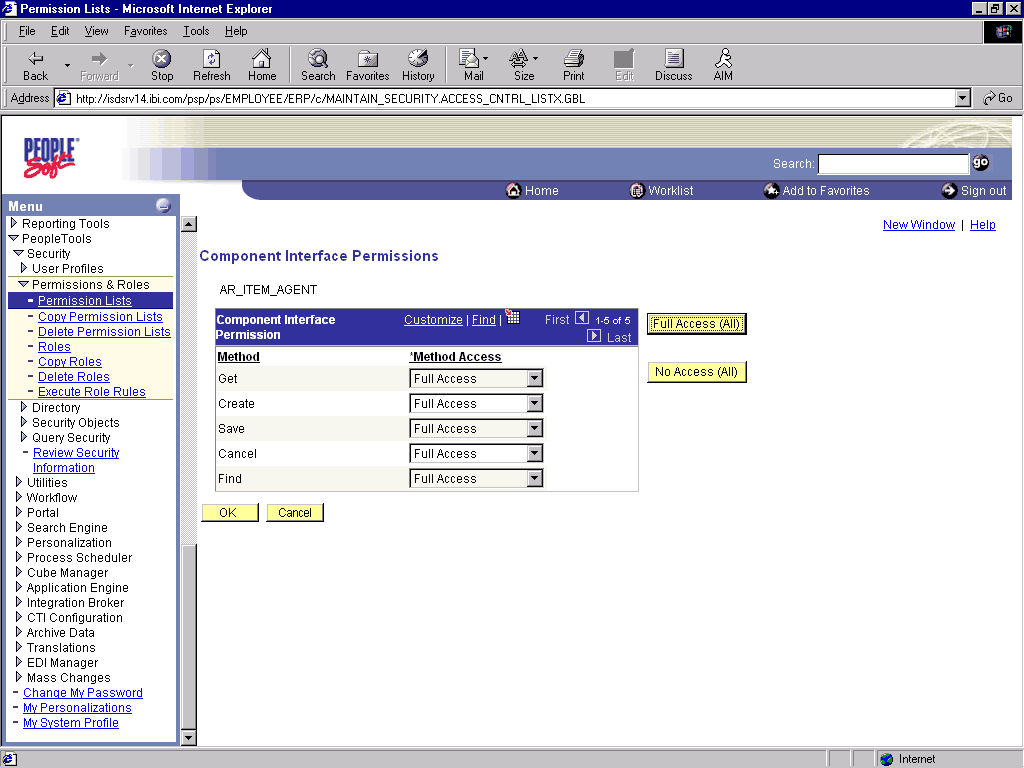
From the lists, select the desired access level for each method.
Click OK.
The following pane is displayed.

OracleAS Adapter for PeopleSoft uses PeopleSoft metadata and component interfaces; therefore, it can accommodate new or modified component interfaces. The adapter makes no assumptions about component interfaces except that they are logical and valid. Each component interface must be tested before being used as a source for the adapter.
If changes are made to the underlying application by the user or by a PeopleSoft upgrade and the changes invalidate a component interface, the user must repair the invalid component interface before the adapter uses it.
Testing a Component Interface
To test a component interface:
In Application Designer, select Test Component Interface from the Tools menu.
The Component Interface Tester dialog box is displayed.
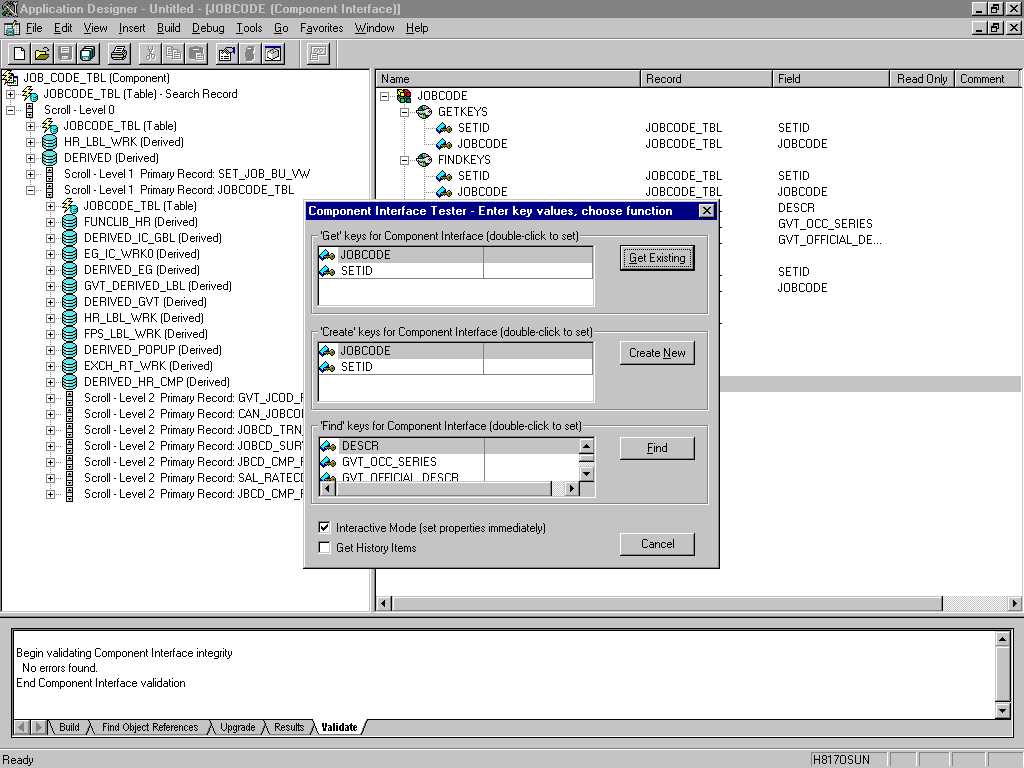
If required, click the Component Interface Tester dialog box to bring it to the foreground.
To test the component interface, use one the following methods.
To test the component interface using the Find method, click Find.
The Component Interface Tester - Find Results dialog box displays all of the possible entries for the underlying component. If there are more than 300 entries, a message appears.

In the left pane of the Find Results dialog box, select a field.
To display the relevant data for that particular field, click Get Selected.
The following dialog box is displayed.
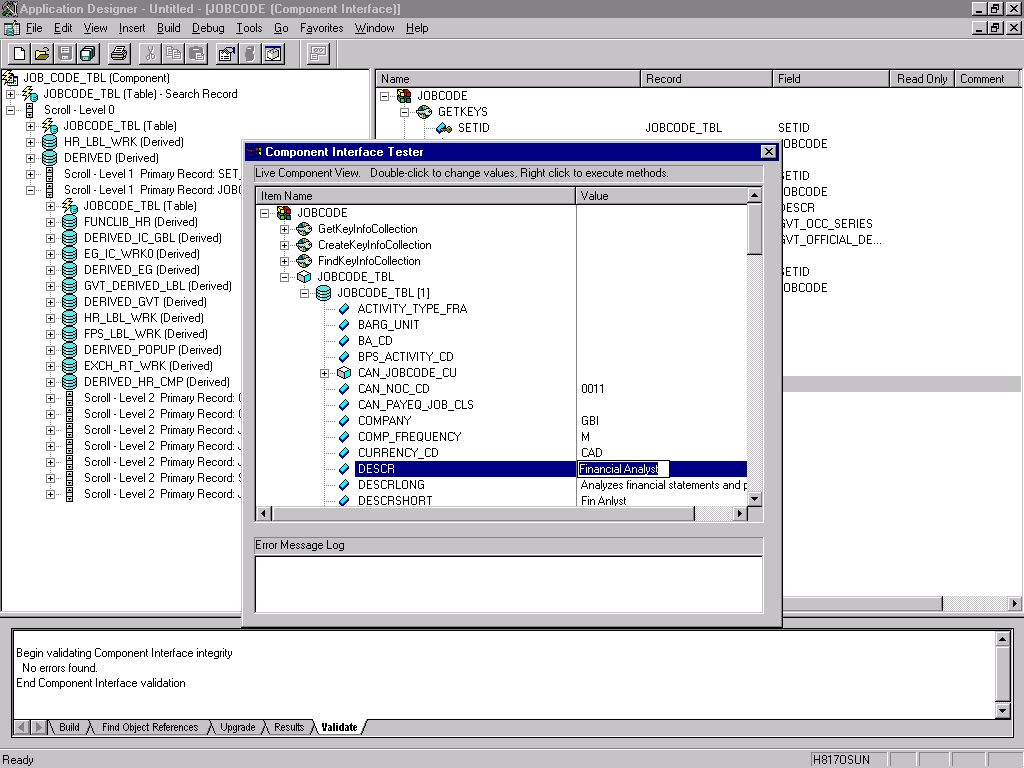
If the security settings permit, you can change the values in the individual fields.
To test the component interface using the Get method:
Enter the existing key(s).
Click Get Existing.
This returns the exposed properties for the key that you entered. You can change values if Update access was specified.
Alternatively, you can test using the Create method.
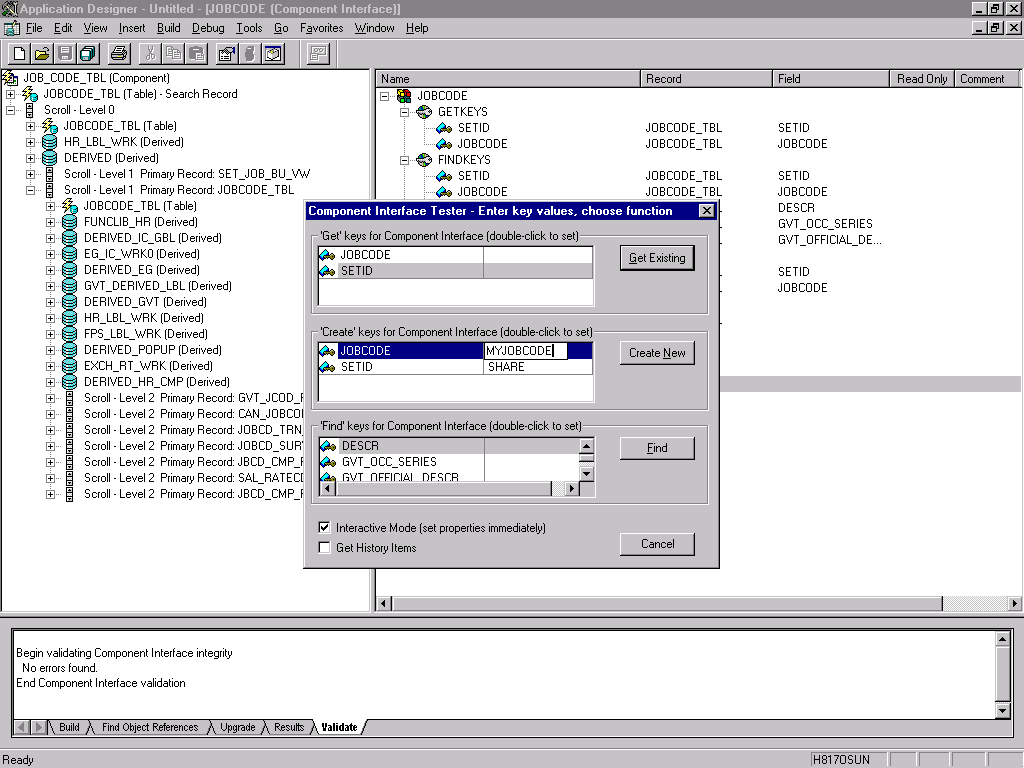
Description of the illustration i_compinterfacetester2.gif
Perform the following steps:
Enter all required key values.
Click Create New.
When you enter valid values in Create keys, a pane showing the JOBCODE data is displayed after the Table name is expanded with default data in place.
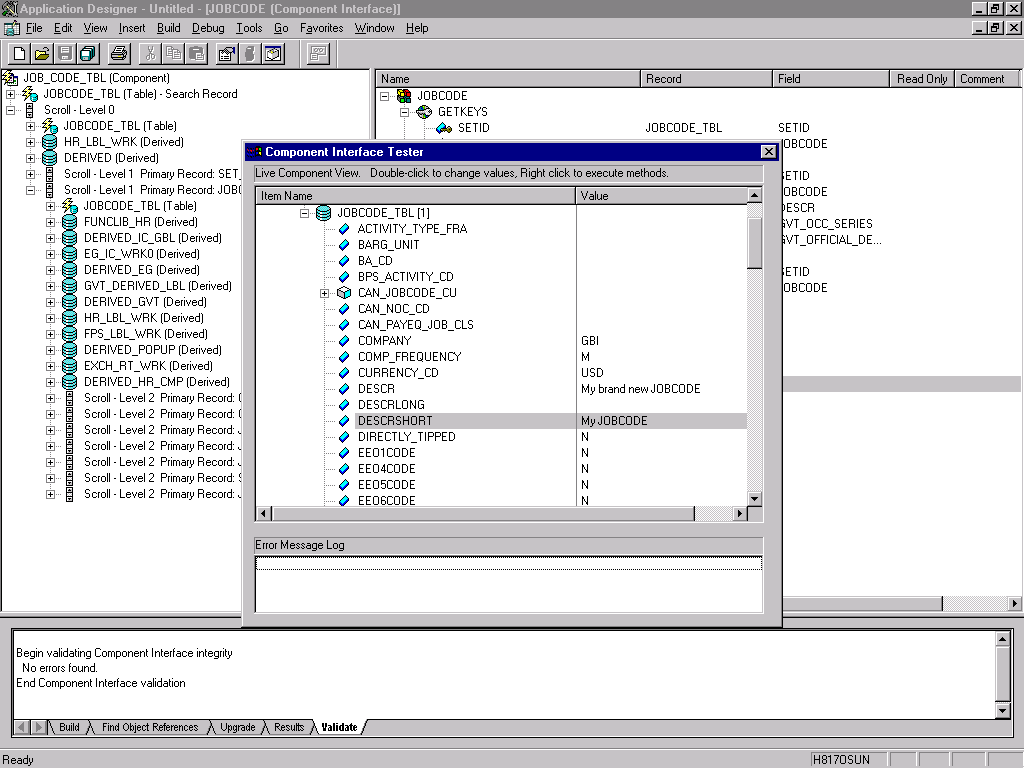
You can change fields at this point. Changes are validated against the component's underlying business logic.
After you finish making changes, right-click the top item in the pane.
To save your changes, click Save.
The keys used to create the record can be used with the Get method for viewing data. The data that was added can be viewed in the PeopleSoft Component as shown in the following example. The Effective Date is one of the default values.
You have finished testing the component interface. Before using the component interface, you must generate its API. See Appendix A, "Generating Component Interface APIs" for more information.