|
Oracle® Application Server Adapter for PeopleSoft User's Guide
10g Release 2 (10.1.2) B14060-02 |
|
 Previous |
 Next |
|
Oracle® Application Server Adapter for PeopleSoft User's Guide
10g Release 2 (10.1.2) B14060-02 |
|
 Previous |
 Next |
This section describes how to configure and test a TCP/IP or HTTP target connector and a TCP/IP handler for PeopleSoft.
The following configuration topics assume you are familiar with PeopleSoft Integration Broker (in release 8.4) or Application Messaging (in release 8.1). If not, see Appendix D, "Using PeopleSoft Integration Broker" for more information. For a complete description before you work with OracleAS Adapter for PeopleSoft, see your PeopleSoft documentation.
|
Note: In PeopleSoft release 8.1, the messaging architecture is called Application Messaging and includes Application Messaging Gateway. In release 8.4, the messaging architecture is called Integration Broker, which includes Integration Gateway. When discussing release- independent issues, this section uses release 8.4 terminology. When discussing release-specific issues, it uses release-specific terminology. |
The procedures in this topic assume that your Integration Broker environment is configured and tested. See Appendix D, "Using PeopleSoft Integration Broker" for more information.
Configure the gateway for the TCP/IP Target Connector or HTTP Target Connector. See Configuring the TCP/IP Target Connector for more information.
|
Note: This step is optional when configuring the HTTP Connector. The HTTP Target Connector is supplied with your PeopleSoft application, and no special configuration steps are required. If you choose, you may configure default connection values on the Gateway. You can override these values when you configure the node. |
Configure the node. See Configuring the Node for the TCP/IP84 Connector for more information.
|
Note: Starting with release 8.4, the Integration Broker is delivered with an HTTP Outbound Connector. See Configuring the HTTP Connector for more information. |
To configure the gateway for the TCP/IP Target Connector:
In a Web browser, open your PeopleSoft release 8.4 application.
In the menu pane, expand PeopleTools, then expand Integration Broker, and click Gateways.
Open the LOCAL Gateway ID.
A pane similar to the following Gateway ID pane is displayed.

If you do not see the TCPIPTARGET84 Connector ID, click Load and scroll to locate TCPIPTARGET84 in the list.
If TCPIPTARGET84 still does not appear, the connector class file was not installed in the Integration Gateway.
Perform the following steps:
Click the Properties URL for TCPIPTARGET84.
The Properties pane for TCPIPTARGET84 is displayed. Default values appear for the host and the port. For complex business situations, you can override this setting on the individual node.
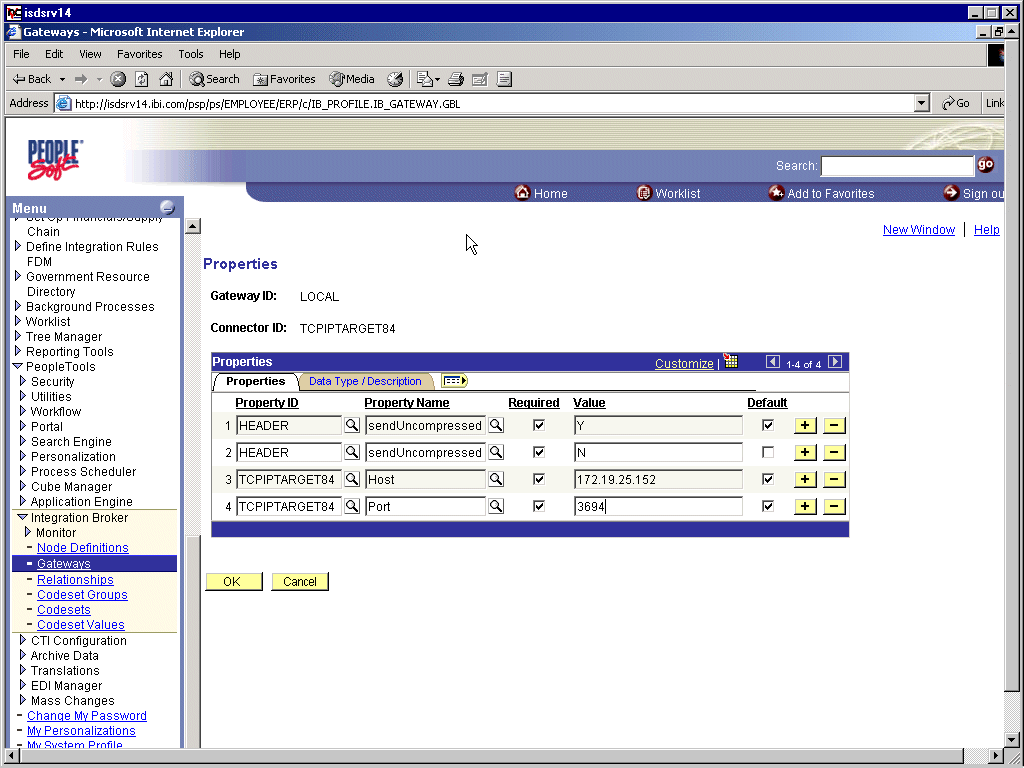
Enter the values for the host and the port for the machine on which your PeopleSoft XML listener is listening for incoming messages.
Click OK.
The Gateway window is displayed.
Scroll to the bottom of the window and click Save.
You have finished configuring the gateway for the TCP/IP Target Connector.
To configure the node for the TCP/IP84 Connector:
In the Menu pane, select PeopleTools, Integration Broker, and then click Node Definitions.
Select the node that you want to configure.
|
Note: This procedure uses a node called EXTERNAL. For more information about creating and using nodes, see Appendix D, "Using PeopleSoft Integration Broker" or your PeopleSoft documentation. |
Perform the following steps:
Select External from the Node Type list.
Select Implicit from the Routing Type list.
Select the Connectors tab.
Perform the following steps:
Select TCPIPTARGET84 as the Connector ID.
Default values appear for the host and the port.
Enter the values for the host and the port for the machine and port that route XML to Oracle Application Server. You can accept or override the default values for individual nodes.
Click Save.
If you are warned that you are changing the connector, click OK.
Select the Transactions tab.
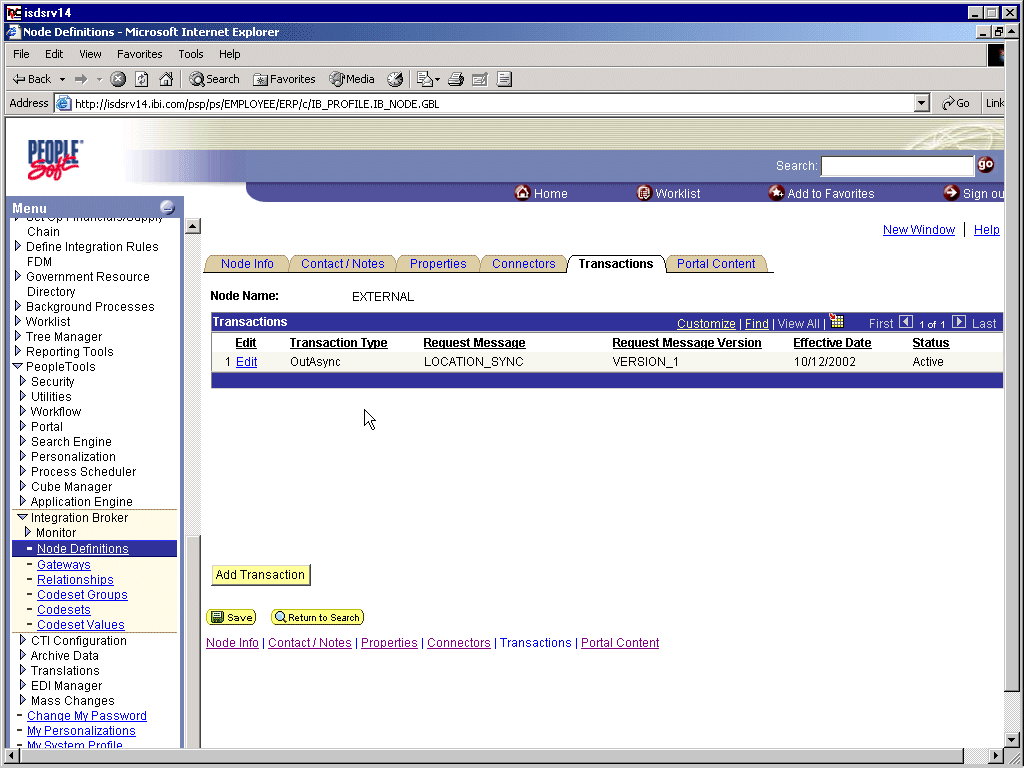
Description of the illustration bea_pstu_5_84d.gif
If there are no transactions, click Add Transaction to add the message with which you are working. In this procedure, the node is already configured with the LOCATION_SYNC message.
To view transaction details for the LOCATION_SYNC message, click Edit.
The Transaction Detail tab appears

Add the message with which you are working.
Verify that the Routing Type is Implicit.
Click Save.
Return to the Transactions tab.
To edit additional transactions, click Edit to navigate to the Transaction Detail tab.
In the Transaction Detail tab, select Inactive from the Status list.
Inactive status is for initial testing only. After you test your configuration, you may change the status to Active and have as many nodes and transactions as required to satisfy your business requirements.
Click Save.
You are ready to send XML messages to your PeopleSoft XML listener.
The HTTP Target Connector is supplied with your PeopleSoft application, and no special configuration steps are required. If you choose, you may configure default connection values on the Gateway. You can override these values when you configure the node. To configure the gateway for the HTTP Target Connector:
In a Web browser, open your PeopleSoft 8.4 application.
In the Menu pane, expand PeopleTools, then expand Integration Broker, and click Gateways.
Open the LOCAL Gateway ID.
A pane similar to the following Gateway ID pane is displayed.

If you do not see the HTTPTARGET Connector ID, click Load.
If it does not appear, your Gateway was not installed properly. Check with your PeopleSoft system administrator.
Click the Properties URL for HTTPTARGET.
The Properties pane for HTTPTARGET displays default values:
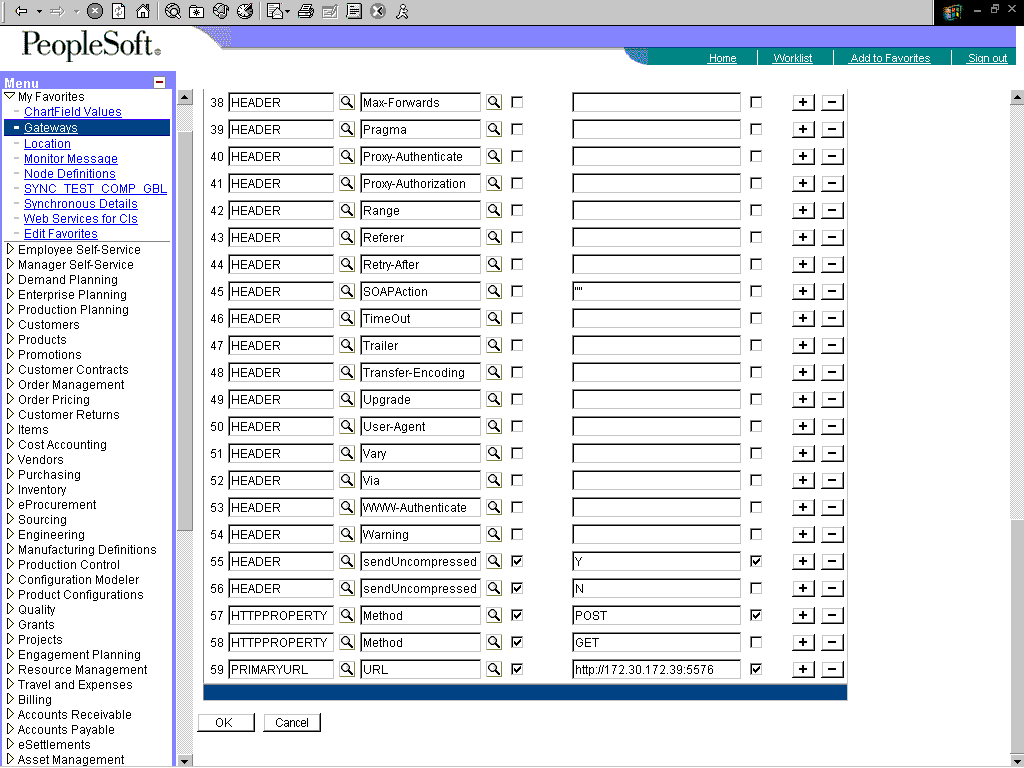
Scroll to the bottom and enter a value for the PRIMARYURL.
This is the default HTTP address (machine and port) on which your PeopleSoft XML listener is listening for incoming messages.
|
Note: For complex business situations, you can override this setting on the individual node. |
Click OK.
The Gateway window is displayed.
Scroll to the bottom of the window and click Save.
You have finished configuring the gateway for the HTTP Target Connector.
Starting with release 8.4, the Integration Broker is delivered with an HTTP Outbound Connector. This connector can be used in place of the TCP/IP84 connector for sending messages to Oracle Application Server.
To configure the node to use the HTTP Connector:

Description of the illustration bea_pstu_5_84c.gif
In the Menu pane, expand PeopleTools, Integration Broker, and then click Node Definitions.
Select the node that you want to configure.
|
Note: This procedure uses a node called EXTERNAL. For more information about creating and using nodes, see Appendix D, "Using PeopleSoft Integration Broker" or your PeopleSoft documentation. |
From the Node Type list, select External.
From the Routing Type list, select Implicit.
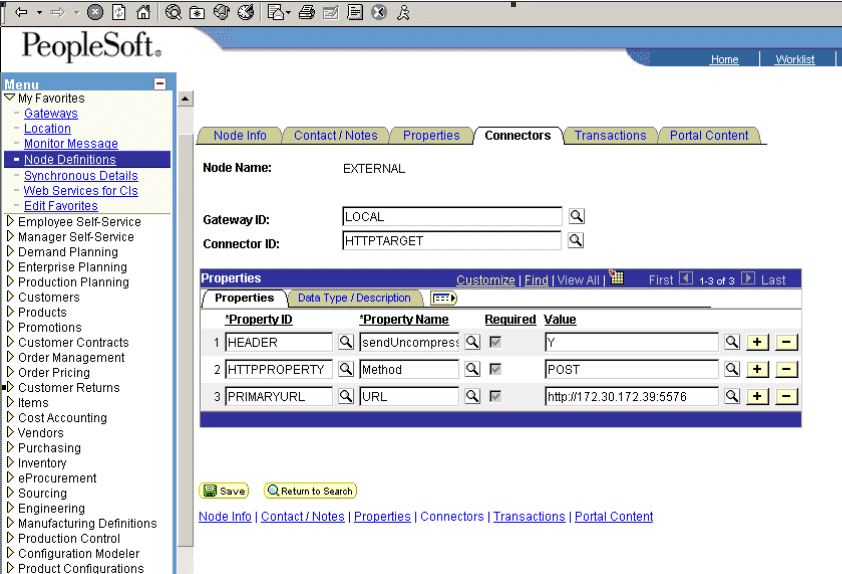
Select the Connectors tab.
Change the Connector ID to HTTPTARGET.
Enter a value for each property based on the following:
| Property ID | Property Name | Value |
|---|---|---|
|
HEADER |
sendUncompressed |
Y |
|
HTTPPROPERTY |
Method |
POST |
|
PRIMARYURL |
URL |
URL and the port of the HTTP listener |
Click Save.
If you are warned that you are changing the Connector, click OK.
Select the Transactions tab.
The following pane is displayed.

If there are no transactions, click Add Transaction.
In this procedure, the node is already configured with the LOCATION_SYNC message.
The Transaction Detail tab appears.

Description of the illustration bea_pstu_5_84e.gif
You can add the message with which you are working.
Verify that the Routing Type is Implicit.
Click Save.
Return to the Transaction List.
If there are other transactions, edit them.
Set the status to Inactive.
Inactive status is for initial testing only. After you test your configuration, you may change the status to Active and have as many nodes and transactions as required to satisfy your business requirements.
Click Save on the Transaction List.
You are ready to send XML messages to your PeopleSoft XML listener.
The following procedure assumes that your Application Messaging environment is properly configured and tested. See Appendix D, "Using PeopleSoft Integration Broker" for more information.
To configure the TCP/IP Handler for PeopleSoft 8.1 to send messages to Oracle Application Server:
In a Web browser, launch the PeopleSoft 8.1 Gateway Configuration servlet interface.
If the Simple File Handler is currently loaded, unload and delete it before proceeding.
You must see an empty Handler directory.
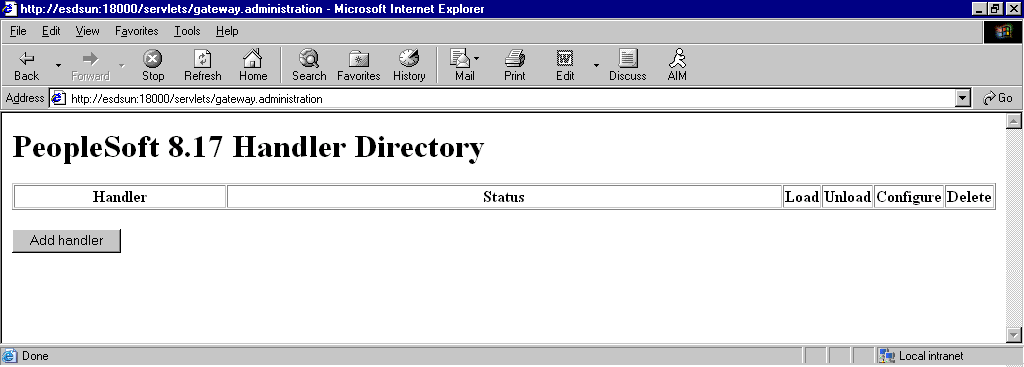
Click Add handler.
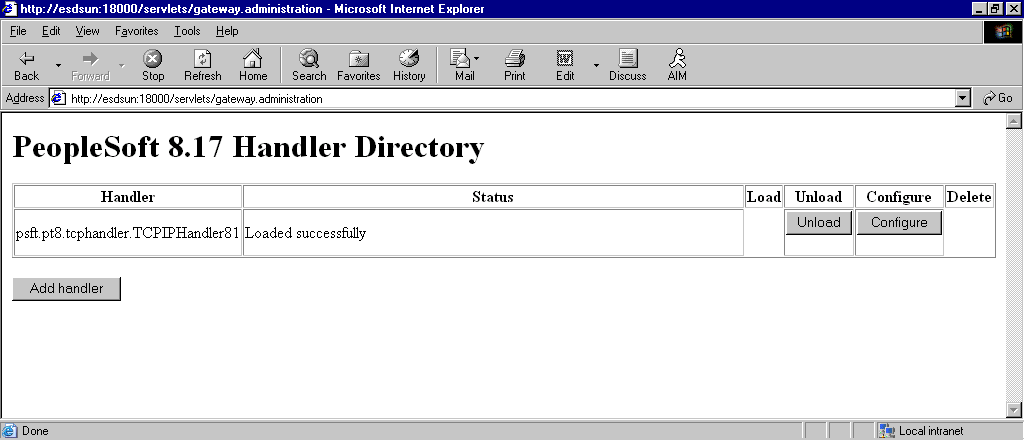
Description of the illustration iway_pstu_handirloaded.gif
Perform the following steps:
Enter the full path of TCPIPHandler81 (case-sensitive):
psft.pt8.tcphandler.TCPIPHandler81
Click Save.
Click Load.
The PeopleSoft Handler Directory window is displayed.
Click Configure.
The TCPIP81 Handler Directory window is displayed.
Click Add a TCPIP81 node.
|
Note: The screens illustrating this procedure show a node named EXTERNAL. For more information about creating and using nodes, see Appendix D, "Using PeopleSoft Integration Broker" or your PeopleSoft documentation. |
The Add TCPIP81 Handler window is displayed.

Enter the requested values based on the information in the following table.
| Field | Value Example | Description |
|---|---|---|
| Node Name | EXTERNAL | The name of the TCP/IP node. |
| Host Name | 172.19.25.152 | The machine on which your PeopleSoft XML listener is listening for incoming messages. |
| Port | 3694 | The port on which your PeopleSoft XML listener is listening for incoming messages. |
| Trace Directory | /tmp | The directory where a trace file is created when errors occur in message delivery. |
The system does not validate your entries.
Click Save.
The TCPIP81 Handler Directory window is displayed.

Description of the illustration bea_pstu_5_81e.gif
For your changes to take effect, click Back to Handler Directory to return to the PeopleSoft 8.1 Handler Directory window.
Click Unload and re-Load TCPIPHandler81.
You are now ready to send messages from PeopleSoft to OracleAS Adapter for PeopleSoft.
PeopleSoft 8.1 and 8.4 provide a ping node mechanism for testing your configuration. The mechanism functions identically in both versions.
Test your configuration to ensure that:
Oracle Application Server is up and running.
The server name and port number for PeopleSoft and Oracle Application Server match.
The default page for HTTP exists.
To test a PeopleSoft configuration:
In a Web browser, open your PeopleSoft application.
Navigate to the message monitoring menu.
For PeopleSoft 8.4:
In the menu pane, expand PeopleTools, Integration Broker, and Monitor.
Select Monitor Message.
For PeopleSoft 8.1:
In the menu pane, expand Home, PeopleTools, Application Message Monitor, and Use.
Select Application Message Monitor.
Click the Node Status tab.
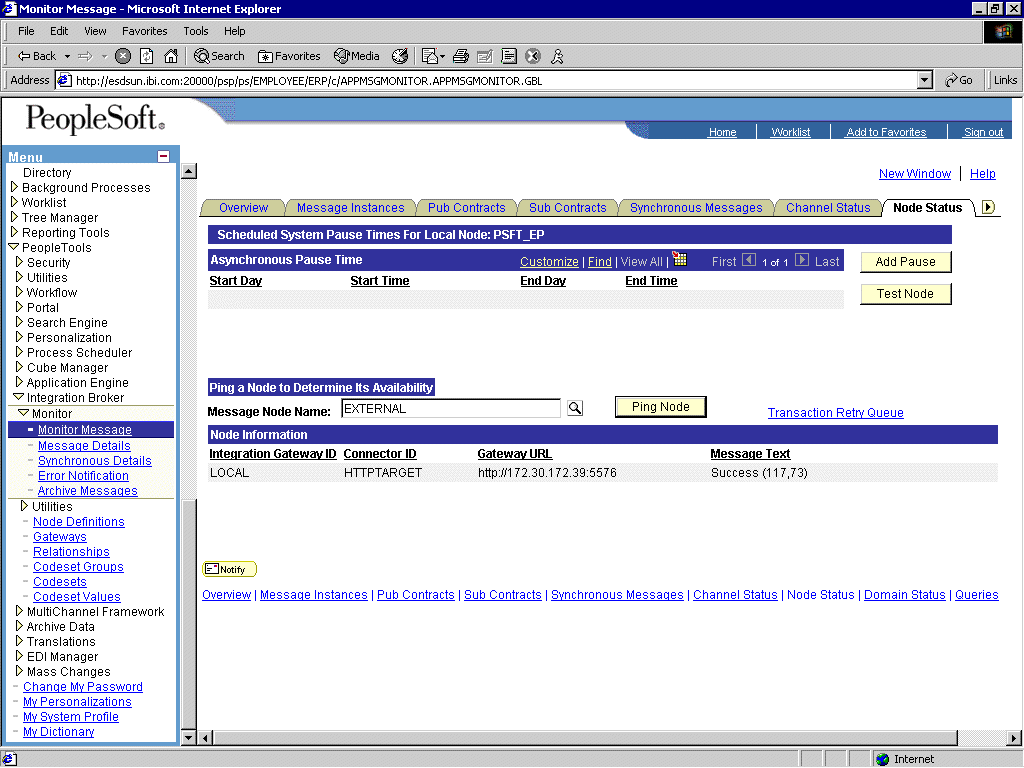
Description of the illustration ixte104_ping01.gif
Perform the following steps:
From the Message Node Name list, select your node.
Click Ping Node.
If you properly configured both PeopleSoft and Oracle Application Server, you receive a Success message.
An error indicates a configuration problem. For more information, see the Integration Broker error log.