|
Oracle® Application Server Integration InterConnect User's Guide
10g Release 2 (10.1.2) B14069-02 |
|
 Previous |
 Next |
|
Oracle® Application Server Integration InterConnect User's Guide
10g Release 2 (10.1.2) B14069-02 |
|
 Previous |
 Next |
This chapter describes how to create and manage applications, common views, and business objects using iStudio. It contains the following topics:
Each component integrated with OracleAS Integration InterConnect is referred to as an application. Each application expresses interest in specific messages, what its internal data type is, and how the message should be mapped to or from that internal type to the external world.
Each application has its internal data types, formats, and structures that it exposes to the external world. This is the application's public interface. This application interface is called the application view of data. Transformations are used to bridge the gap between application views and common views of data.
Once an application is created in iStudio, it can start participating in the integration scenario by plugging into events and procedures available in the common view.
Application Data Types are useful for reusing structure definitions for application views. You can define an application data type once and then use it in multiple application views. They are especially useful for defining complex hierarchical data. Application data types have the same function as common data types but relate to a particular application.
To create an application:
From the File menu, select New, then select Application. The Create Application dialog box is displayed.
Enter a name for the application in the Application Name field.
Click OK.
The application created is displayed in the Design Navigation list under the Applications node.
The common view is the hub view of the integration, where each spoke is an application wanting to participate in the integration. After defining a common view by creating a business object and common data types, existing events can be published or subscribed to, and procedures can be invoked or implemented.
When defining a common view, you must create business objects and common data types.
To create a new business object:
From the File menu, select New, then select Business Object. The Create Business Object dialog box is displayed.
Enter a name for the business object in the Business Object Name field.
Click OK. The business object is displayed in the Design Navigation list under the Common View node.
When creating the data associated with an event or a procedure, it is possible to define the data once and reuse it for different integration points. Common data types are used to define such data for reuse and are especially useful for defining complex hierarchical data.
For example, a purchase order contains a header object and an array of line item objects. In addition, the header object contains two address objects: Bill_To and Ship_To. As a result, the purchase order can be defined once and used for other purchase order-related integration points, such as Create_Purchase_Order, Update_Purchase_Order, and Get_Purchase_Order. Moreover, Address can be defined once and used in the Bill_To and Ship_To addresses.
To create a common data type:
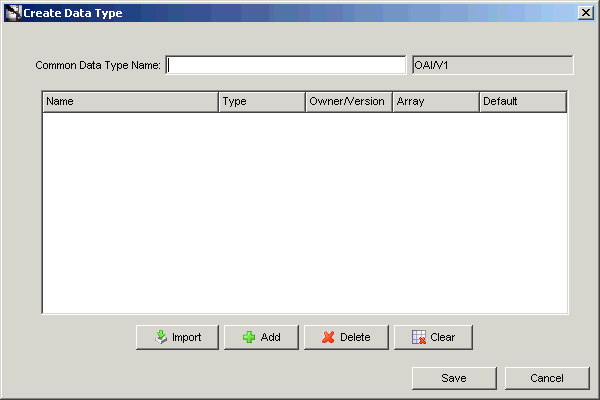
From the File menu, select New, then select Common Data Type. The Create Data Type dialog box is displayed.

Enter a name for the common data type in the Common Data Type Name field.
The owner and version number of the common data type are displayed next to the common data type name. This field cannot be edited.
Specify the attributes for this common data type using one of the following methods:
Add attributes individually.
Import attributes from already existing application data types or APIs.
To add attributes:
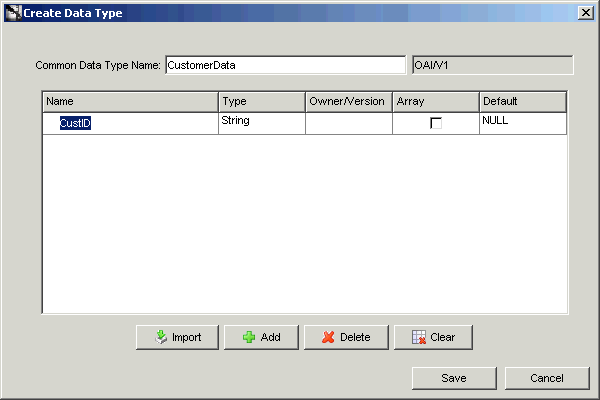
In the Create Data Type dialog box, click Add. A new entry is displayed in the attribute list.

Specify the following information by editing the fields.
Name: The name of the attribute.
Type: The type of the attribute. Select the type by selecting the Type column in the attribute entry. A list is displayed. The attribute can be of primitive type such as string, integer, float, double, date, or another common data type used to build hierarchical data types.
Array: Select this check box if the attribute is a collection instead of a single attribute.
Default: The default value of the field if it is not populated at run time.
Click Save. Repeat the preceding steps to add other attributes.
To import attributes:
In the Create Data Type dialog box, click Import. Attributes can be imported from various sources.
The following steps describe the database import facility.
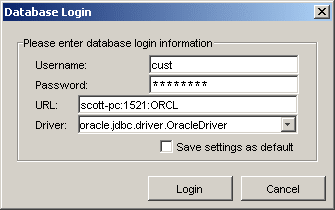
Click Database. The Database Login dialog box is displayed.

Enter information in the following fields:
User Name: The database login name
Password: The database login password
URL: The computer name: port number: database SID
Driver: The JDBC driver used to connect to the database
Save settings as default: Select this check box to save the settings for the workspace.
Click Login.
After logging in, the database tables and arguments are displayed in the Database Browser window.
Select the fields to add. To select a range of fields, press Shift when clicking the mouse button. To select multiple items, press Ctrl while clicking the mouse button.

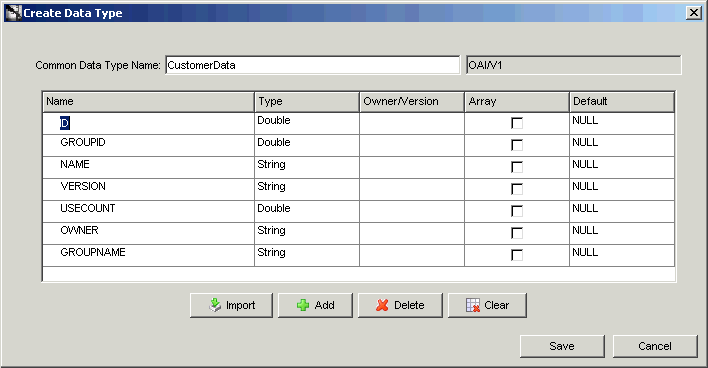
Click Done to import the attributes into the common data type. The selected attributes are displayed in the Create Data Type dialog box.
