|
Oracle® Application Server Integration InterConnect User's Guide
10g Release 2 (10.1.2) B14069-02 |
|
 Previous |
 Next |
|
Oracle® Application Server Integration InterConnect User's Guide
10g Release 2 (10.1.2) B14069-02 |
|
 Previous |
 Next |
This chapter describes iStudio and its concepts. It contains the following topics:
The iStudio interface is a design-time integration specification tool used to help business analysts specify the integration logic at a functional level, instead of a technical coding level. iStudio exposes the integration methodology using simple wizards and reduces or eliminates the need for writing code to specify the integration logic. This reduces the total time required to complete an integration.
iStudio is a multiuser tool with fine-grained locking for all OracleAS Integration InterConnect first-class objects. This enables multiple users to work simultaneously on the same integration scenario without compromising the consistency of the metadata.
iStudio enables business analysts to perform the following tasks:
Define the data that needs to be exchanged across applications.
Semantically map the data across applications.
Define the business process collaboration across applications and associate the semantic maps with business processes if required.
Configure and deploy the integration.
iStudio is deployed as a standalone Java application running outside the database. iStudio runs only on Windows and can be deployed on any computer that has access to the computer where the hub is installed.
|
See Also: Oracle Application Server Integration InterConnect Installation Guide |
The following concepts are described:
Each component integrated with OracleAS Integration InterConnect is referred to as an application. Each application expresses interest in specific messages, what its internal data type is, and how the message should be mapped to or from that internal type to the external world.
OracleAS Integration InterConnect follows a hub-and-spoke integration methodology. The common view is the hub view of the integration, in which each spoke is an application participating in the integration. The common view consists of the following elements:
Business Objects: A collection of logically related integration points. For example, Create Customer, Update Customer, Delete Customer, and Get Customer Info are integration points that logically belong to a Customer business object.
Events: An integration point used to model the publish/subscribe paradigm. An event has associated data, which is the common view of all the data to be exchanged through this event.
Procedures: An integration point used to model the request/reply paradigm. This is a modeling paradigm only. No actual procedures are called. Like events, procedures have associated data that represents the common view of data exchanged through the procedure.
Common Data Types: A data type used to define data for reuse. It is useful to define complex hierarchical data.
An event is an integration point used to model the publish/subscribe paradigm. An event is associated with only one data set. An event has associated data that is the common view of all data to be exchanged through the event. The data associated with an event in the common view must be a superset of the data of participating applications. The publish/subscribe paradigm is used for asynchronous one-way communication. The sending application is said to publish the event. The receiving application subscribes to the event.
A procedure is an integration point used to model the request/reply paradigm. This is a modeling paradigm only. No actual procedures are called. The request/reply paradigm is used for two-way context-sensitive communication. This communication can be either synchronous or asynchronous. In synchronous communication, the requesting application is blocked until it receives a reply. In asynchronous communication, the requesting application gets the reply asynchronously, it does not block-wait for the response after sending the request. An application can either invoke a procedure to model sending a request and receiving a reply, or implement a procedure to model receiving a request and sending a reply. Similar to events, procedures have associated data. A procedure has two data sets, one for the request or IN data and one for the reply or OUT data.
Transformations are used to map the application view of data to its corresponding common views and the common view to corresponding application view. This is used in the context of publishing or subscribing to an event or invoking or implementing a procedure. There are several built-in transformation routines provided with OracleAS Integration InterConnect that are used to build complex mappings. In addition, using the iStudio SDK enables new transformation routines to be created using Java. These transformations can be imported into iStudio and then used similar to a built-in routine.
For example, assume that there are two applications, App1 and App2.
App1 publishes the event, and its application view contains the following fields:
First Name
Last Name
Middle Initial
App2 subscribes to the event, and its application view contains the following field:
Name: One field in the form of LastName, FirstName
When publishing or subscribing to the event, the application view for App1 and App2 must be mapped to the common view using transformations. Assume that the common view event contains the following fields:
Prefix
First Name
Last Name
Middle Initial
Suffix
So, there are two transformations performed. In the first, the data from App1 is transformed to the common view, and in the second, the data from the common view is transformed to the application view of App2.
iStudio supports versioning for application and common data types, events, procedures, and messages.
An owner is the creator of the object and only the owner can modify the object. However, other users can create new versions or copy the original object under a new name. The owner is specified when the repository is installed.
The following functionality is available for versioning:
Automatic Versioning: Whenever a new version is created, it automatically gets a version number. For example, assume that an event called NewCustomerEvent is created. When this object is created for the first time, the assigned owner is OAI and the version is V1. The event name is NewCustomerEvent/OAI/V1.
Modify Object: The owner is the only user who can modify the contents of an event and the data associated with it. However, the owner cannot change the version number or the name of the event.
Create New Version: If the owner wants to retain the original event but wants to create a new version of the information with modified data, then the owner can create a new version. For example, assume that OAI wants to retain the original version of the NewCustomerEvent object but wants a new version of the object with modified data. Using the Create New Version functionality will provide two objects, NewCustomerEvent/OAI/V1 and NewCustomerEvent/OAI/V2.
Load Version: Not all versions of objects are loaded into iStudio. To work with a specific version of an object, use the Load Version capability. When a new version is created, it becomes the current version.
Copy Object: To create a new object that has many elements identical to an already existing object, first load the existing object and copy it in iStudio. Copying the object allows only modifications to the data and modifications to the name of the event. Once the name has been modified, the existing object and the object with the new name will coexist in the repository.
|
Note: Names of events must be unique. |
Tracking fields are one or more application view fields in the context of a particular message. If specified in iStudio, then tracking fields can be used to track messages at run time using the Oracle InterConnect Manager. Tracking is performed only from the perspective of the sending application.
For example, if App1 publishes a new purchase order and specifies the PO_order number field as the tracking field, then you can log in to the run-time console and specify the message to track, or New Purchase Order in this case. You are then prompted to enter the purchase order number to display the corresponding tracking information.
Content-based routing enables you to define rules to route messages based on message content. For example, a sales lead generation system can route leads to different sales force automation systems based on the location of the potential customer.
Keys for corresponding entities created in different applications can be correlated through cross-referencing in iStudio.
Code tables can be mapped across systems using domain value mapping in iStudio.
In the OracleAS Integration InterConnect hub, advanced queues in the database are used to store, route, and forward messages from the sending application adapters to the receiving application adapters. The sending adapters evaluate the recipients based on the metadata. The following method is used to route messages.
Every adapter has one or more queues where it receives messages.
The Message Capability Matrix allows queues to be specified for receiving messages on a per-message per-receiving application basis.
|
Note: By default, OracleAS Integration InterConnect comes preconfigured with one queue named theoai_hub_queue. This queue is used for all messages and applications. This queue does not need to be changed unless the single-queue implementation causes a performance bottleneck.
|
The database and repository must be running before logging in to iStudio. To log in to iStudio, perform the following steps:
From the Windows Start menu, select OracleAS Integration InterConnect.
Select iStudio.
When iStudio starts, the last opened project is automatically loaded into the default workspace.
The main iStudio window has the following parts:
When iStudio is started, the main window is displayed as shown in .
Figure 2-1 OracleAS Integration InterConnect iStudio

The menu bar provides access to all commands. Click each menu to display its commands. Click a command to run it. There are five menus:
File Menu
Edit Menu
Procedure Menu
Event Menu
Help Menu
Use the File menu to create new projects and workspaces, open existing projects and workspaces, or reload existing projects. You can also create objects such as events, procedures, and common data types from the File menu. Commands include:
New Project: Creates a new project.
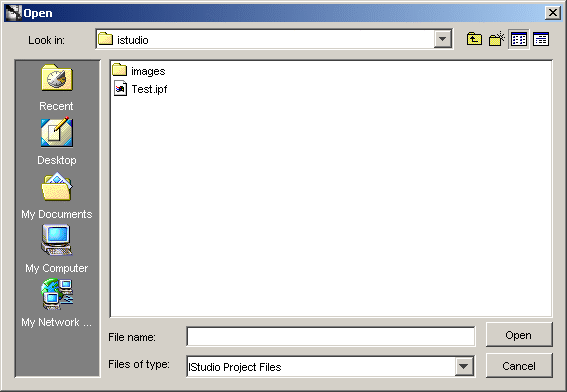
Open Project: Opens an existing project. In the Open dialog box, select the directory and project, then click Open.
New Workspace: Creates a new workspace.
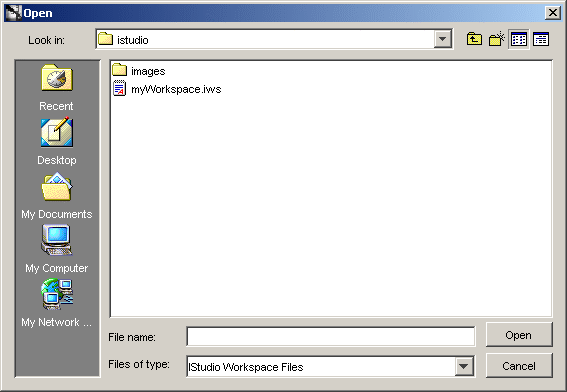
Open Workspace: Opens an existing workspace. In the Open dialog box, select the directory and workspace, then click Open.
Reload Project: Reloads a project. When Reload Project is selected, a list of current projects is displayed. Select the project to reload from the list.
Migrate: Migrates objects from one repository to another. This functionality can be used to migrate metadata from a development to a production integration system.
New: Creates a new object in iStudio. When New is selected, a list of available objects is displayed. Select the object to create.
Sync Adapters: Pushes metadata to adapters. Adapters can be configured to cache metadata locally so that they avoid any run-time performance penalties around repository access. If they are so configured, any changes made in iStudio will need to be explicitly pushed to the corresponding adapters to refresh their local cached repository metadata. This functionality provides that explicit mechanism to refresh adapter-cached metadata.
|
Note: Before you attempt to sync adapters, you must ensure that there are no messages flowing between the relevant adapters. |
Exit: Exits iStudio.
Use the Edit menu to edit, copy, or delete selected objects. If an object is selected and the Edit menu is not available, then that selected object cannot be edited. Commands include:
Edit: Edits a selected object. The type of editing depends on the object selected.
Copy: Copies a selected object.
Delete: Deletes a selected object.
Rename: Renames a selected application.
Version: Creates a new version of or loads a selected object.
Domain Value Map: Adds or removes applications from a domain value map.
Cross Reference Table: Adds or removes applications from a cross reference table.
Workflow: Deploys events to Oracle Workflow or edits Oracle Workflow configuration information.
Use the Procedure menu to invoke or implement procedures. Commands include:
Invoke: Invokes a selected procedure by launching the Invoke Wizard.
Implement: Implements a selected procedure by launching the Implement Wizard.
The toolbar consists of icons that represent frequently used commands. To display a caption describing the icon, place the cursor on the icon. The following functions are provided:
| Function | Icon | Description |
|---|---|---|
| New Project |

Description of the illustration projbutton.gif |
Creates a new project in iStudio. |
| Open Project |

Description of the illustration openprojbutn.gif |
Opens an existing project in iStudio. |
| Create Integration Object |

Description of the illustration createiobutn.gif |
Creates a new integration object. |
| Create Like |

Description of the illustration createlike.gif |
Creates a new integration object similar to an existing object. This icon is enabled only when an object is selected in the Navigator. |
| Edit Integration Object |

Description of the illustration editiobutn.gif |
Edits a selected integration object. |
| Delete Integration Object |

Description of the illustration deleteiobutn.gif |
Deletes a selected integration object. This icon is enabled only when an integration object is selected in the Navigator. |
| Publish Event |

Description of the illustration publisheventbutn.gif |
Publishes a selected event. This icon is enabled only when an integration object is selected in the Navigator. |
| Subscribe Event |

Description of the illustration subeventbutn.gif |
Subscribes to a selected event. This icon is enabled only when an integration object is selected in the Navigator. |
| Invoke Procedure |

Description of the illustration invokeprocbutn.gif |
Invokes a selected procedure. This icon is enabled only when an integration object is selected in the Navigator. |
| Implement Procedure |

Description of the illustration implmntprocbutn.gif |
Implements a selected procedure. This icon is enabled only when an integration object is selected in the Navigator. |
| Help |

Description of the illustration helpbutn.gif |
Displays the help file. |
The Design Navigation list displays the hierarchical layout of all objects used in the design phase of an opened project. Each object type in the Deploy Navigation list is identified by an icon and a name. A container is represented by a folder icon and is a logical grouping of a specific type of object, such as a business object and an application data type.
The objects are grouped as follows:
Common Views
Applications
Workflow
Enabling Infrastructure
The Deploy Navigation list displays the hierarchical structure of all objects used in the deployment phase of an opened project. Each object type in the Deploy Navigation list is identified by an icon and a name. A container is represented by a folder icon and is a logical grouping of a specific type of object, such as process bundles.
The objects are grouped as follows:
Applications
Workflow
You can right-click an object to display a context menu, that is, a shortcut menu related to the object.
| Navigation List | Selected Item | Context Menu Options |
|---|---|---|
| Design | Object, such as Common View, Application, Business Objects, and Common Data Types | New, Edit, Copy, Delete |
|
|
Container object, such as an existing event or procedure | New, Edit, Copy, Delete, Load Version, New Version |
|
|
Workflow object | New, Edit, Copy, Delete, Launch WF Builder, Launch WF Home Page |
| Deploy | Object such an Application | New, Edit, Copy, Delete, Deploy, Export PL/SQL |
|
|
Workflow object | New, Edit, Copy, Delete, Deploy, Edit Configuration, Launch WF Home Page, Export |
|
|
Container object, such as an existing routing object | New, Edit, Copy, Delete, Create Partition |
A workspace stores user settings and preferences, such as application login credentials and information about the project last opened. Inside a workspace, users can work on multiple projects.
To create a new workspace:
From the File menu, select New Workspace. The New Workspace dialog box is displayed.
Enter a name for the workspace in the Workspace Name field.
Click OK.
To open an existing workspace:
From the File menu, select Open Workspace. The Open dialog box is displayed.
Enter the name and path to an existing workspace, or select the workspace to open.

Click Open. The selected workspace is displayed in iStudio.
A project in iStudio captures all the integration logic for one integration scenario. An integration scenario is defined as a set of two or more applications integrated with each other using OracleAS Integration InterConnect. One project corresponds to one repository. For example, a user may have a development integration environment and a production integration environment. These are two separate projects and must be self-contained in their own separate repositories.
As iStudio is a multiuser tool, multiple users can work on the same project, simultaneously, without jeopardizing the integrity of the metadata.
|
Note: To create a project in iStudio, the repository must be running. |
The repository must be running in order to create a project in iStudio. To create a new project in iStudio:
From the File menu, select New Project. The New Project dialog box is displayed.
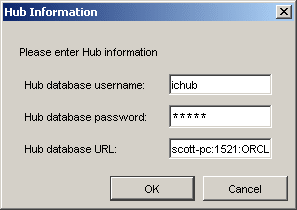
Enter the project name and click OK. The Hub Information dialog box is displayed.

Enter information in the following fields:
Hub database username: The name of the hub database user. The default user name is ichub.
Hub database password: The password associated with the hub database user. The default password is set when OracleAS Integration InterConnect is installed.
Hub database URL: Information of the following format:
machine name:port number:database sid
Click OK.
To open an existing project:
From the File menu, select Open Project. The Open dialog box is displayed.

Enter the name and path to an existing project or select the workspace to open.
Click Open. The selected project opens in iStudio.