|
Oracle® Business Intelligence Discoverer Plus User's Guide
10g Release 2 (10.1.2.1) B13915-04 |
|
 Previous |
 Next |
|
Oracle® Business Intelligence Discoverer Plus User's Guide
10g Release 2 (10.1.2.1) B13915-04 |
|
 Previous |
 Next |
This chapter explains how to print worksheets and graphs in Discoverer Plus Relational, and contains the following topics:
"About elements of a printed worksheet in Discoverer Plus Relational"
"How to print Discoverer workbooks and worksheets to PDF files"
Discoverer enables you to print worksheet data and graphs. For example, you might want to mail a printed copy of a Discoverer worksheet to a colleague. Or, if you have Adobe Acrobat installed, you might want to create an Adobe Acrobat Portable Document Format (PDF) file that you can send to colleagues using e-mail.
When you print a worksheet that contains page items, you can either print the current page item values (i.e. exactly what you see on the screen), or all page item values. For example, if you display Month in the page item area and you are currently displaying January data, you can print the January data or data for all months.
If you print worksheets that contain active parameters, Discoverer prompts you to enter parameter values to refine the data that you print.
When you print a worksheet with a graph in Discoverer Plus Relational, the worksheet and graph print on separate pages. To print a worksheet with a graph on the same printed page, you can do one of the following:
print the worksheet and graph in Discoverer Viewer
use Discoverer Portlet Provider to display multiple worksheets and graphs as portlets on a single portal page, and print the portal page (for more information, see "Publishing worksheets in OracleAS Portal")
export the worksheet and graph to an external application (e.g. HTML) and print the page
The figure below shows the elements of a printed worksheet in Discoverer.
Figure 18-1 Elements of a printed worksheet
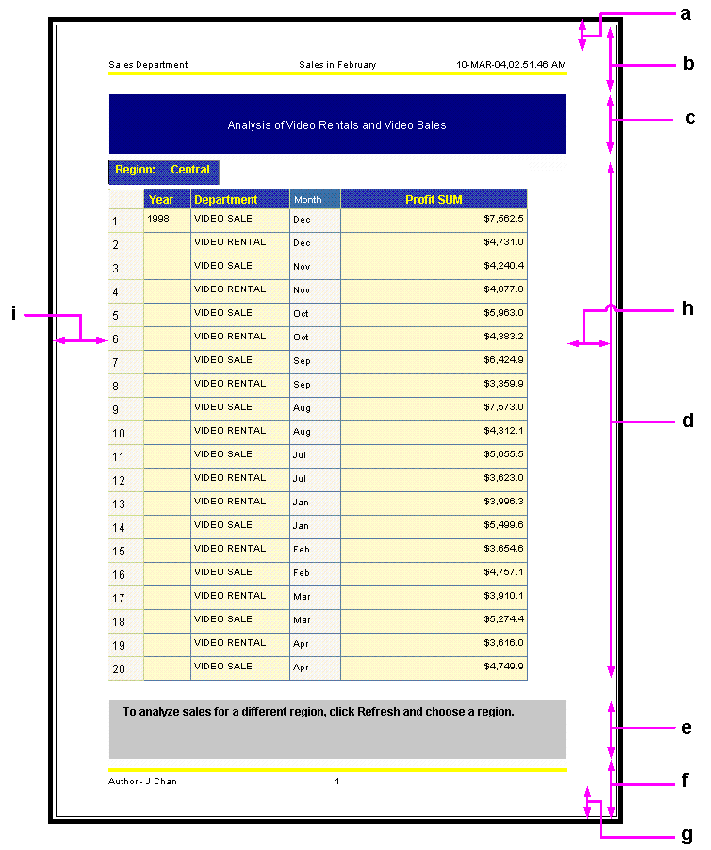
Note: To set print margins, display the "Page Setup dialog: Margins tab" (e.g. click Page Setup on the Print dialog).
Page Setup options are worksheet settings that affect how a worksheet prints out. For example:
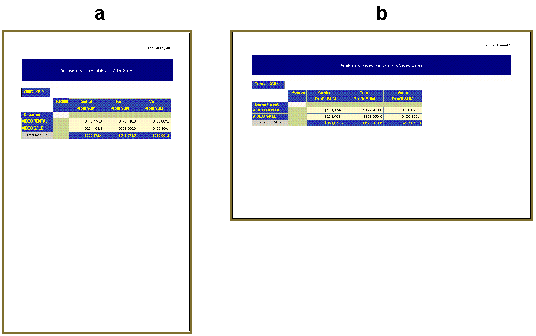
The Orientation setting (i.e. Portrait or Landscape) determines the position of the worksheet relative to the printed page. The example below shows the same worksheet printed with a portrait orientation and a landscape orientation.
Figure 18-2 Discoverer worksheet in portrait and landscape orientation
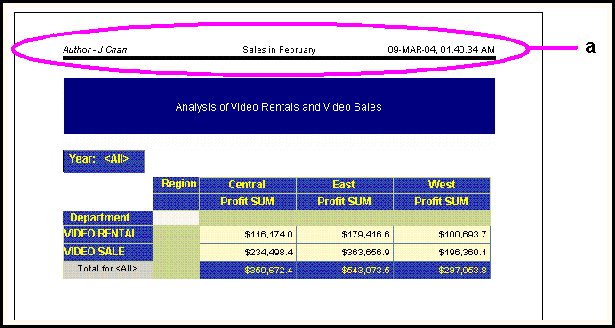
The Header settings enable you to add a header to the top of a printed worksheet. The example below shows a worksheet containing a header that is on the printed page but is not displayed on-screen in Discoverer Plus Relational. In this example, the header contains the name of the worksheet author, the worksheet title, the date and time, and a separating line.
Figure 18-3 Discoverer worksheet with a header
You can specify Page Setup options for each worksheet using the Page Setup dialog (for more information, see "How to change Page Setup options for a worksheet").
Note: The Graph tab is displayed when a worksheet has a graph currently displayed or the Graph check box is selected on the "Print dialog".
To display the Page Setup dialog, choose Page Setup from either the File menu, Print dialog, or Print Preview dialog. When you save a workbook, you save the Page Setup options that you have specified for each worksheet in that workbook.
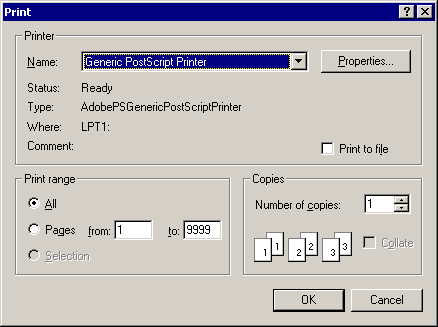
Once you have selected Page Setup options, you click Print do display the operating system print dialog, which enables you set additional print settings. The example below shows the Windows print dialog.
Figure 18-5 Operating system print dialog
For example, for a multi-page worksheet, you might want to print the first page only to check the layout.
Page Setup options for graphs enable you to print a Discoverer graph in exactly the size you want. You set Page Setup options for a graph using the "Page Setup dialog: Graph tab".
Figure 18-6 Page Setup options dialog: Graph tab
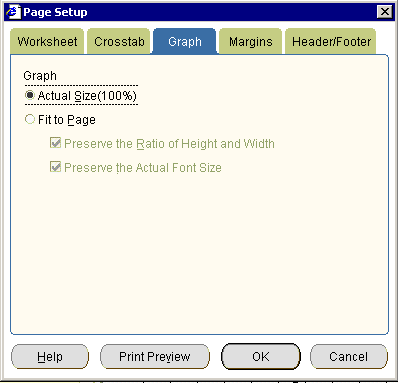
For example, you might have a large graph displayed on screen (see screenshot below).
Figure 18-7 Discoverer worksheet containing a large graph
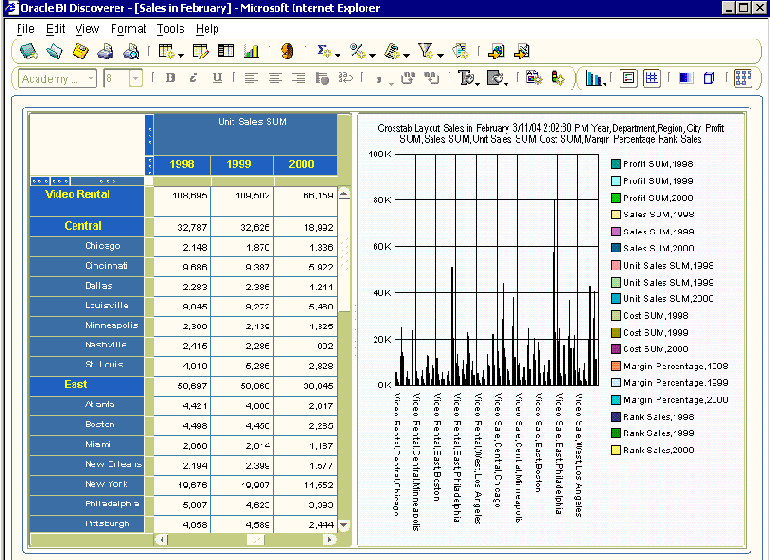
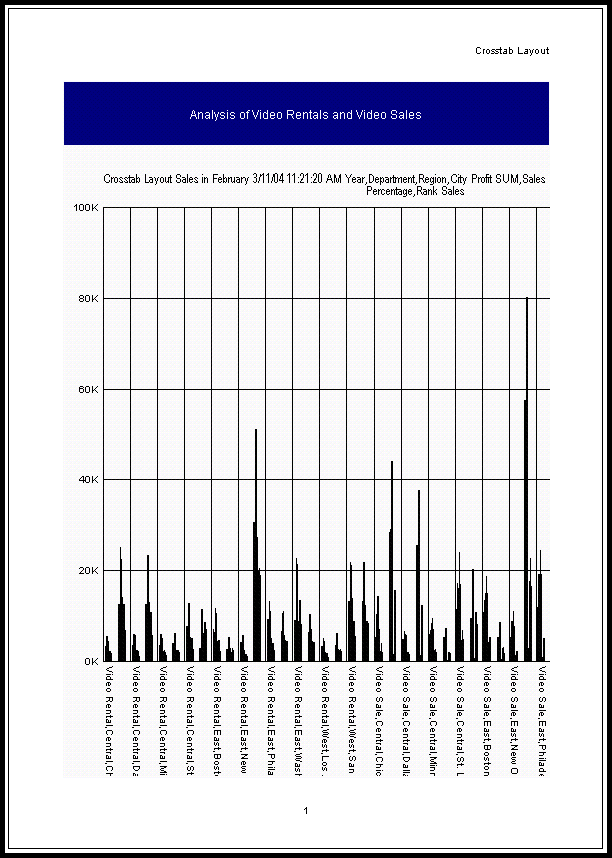
If you select the Actual size check box on the "Page Setup dialog: Graph tab" and print the graph, Discoverer crops the graph. In the screenshot below you can see that Discoverer crops the graph legend from the right hand side.
Figure 18-8 Discoverer printed worksheet with a cropped graph
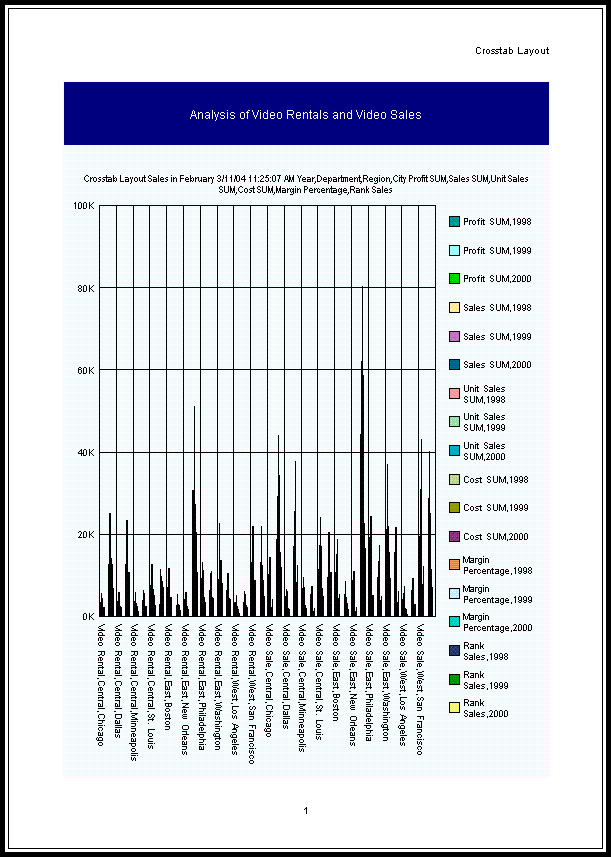
If you select the Fit to page check box on the "Page Setup dialog: Graph tab" and print the graph, Discoverer prints the whole graph (see screenshot below).
Figure 18-9 Discoverer printed worksheet with a correctly printed graph
If you select the Fit to page check box with Preserve the Ratio of Height and Width selected on the "Page Setup dialog: Graph tab" and print the graph, Discoverer maintains the graph proportions (see screenshot below).
Figure 18-10 Discoverer graph with maintained proportions
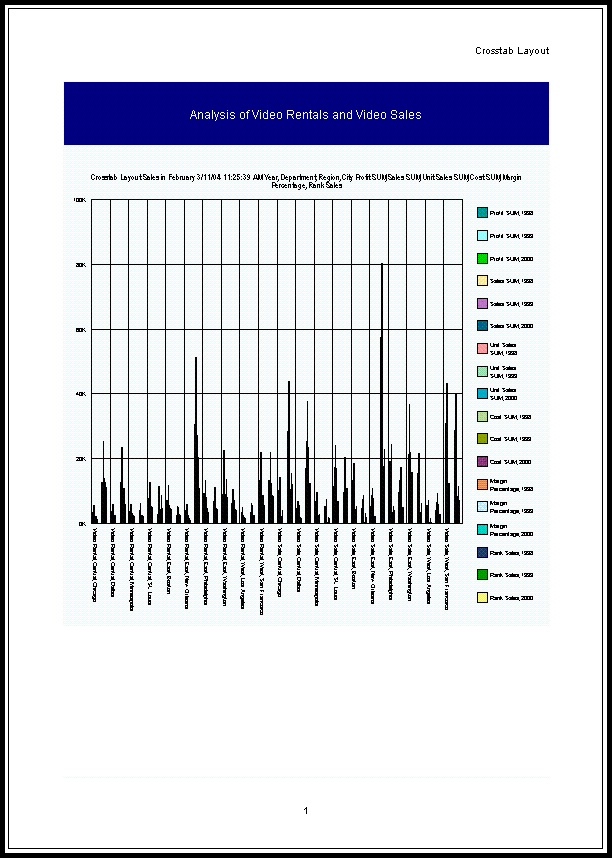
If you select the Fit to page check box with Preserve the Ratio of Height and Width selected and Preserve the Actual Font Size selected on the "Page Setup dialog: Graph tab" and print the graph, Discoverer maintains the graph proportions and original font size (see screenshot below).
Figure 18-11 Discoverer graph with maintained proportions and font size
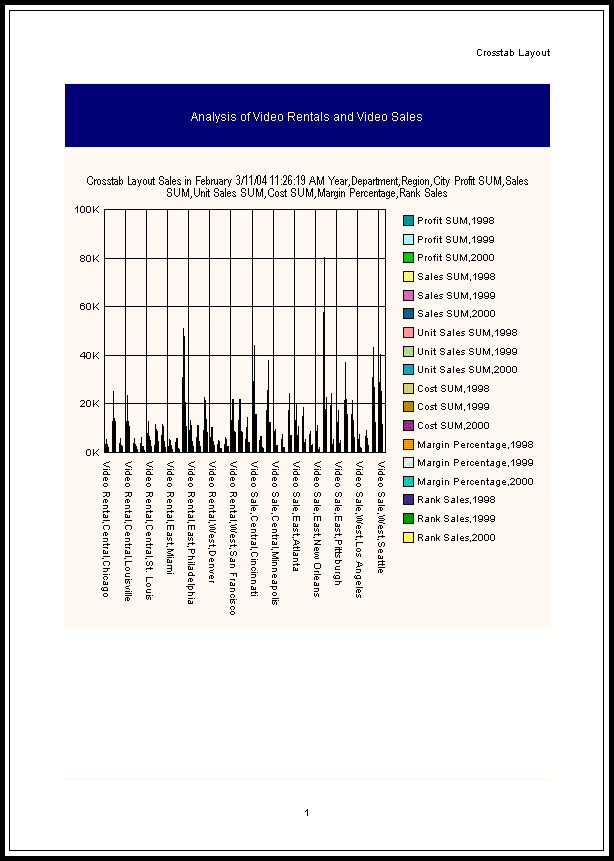
You change Page Setup options for a worksheet to specify print layout options (e.g. scaling, headers and footers). For example, you might want to add a header or footer to a printed worksheet.
To change Page Setup options for a worksheet:
Display the worksheet that you want to edit.
Choose File | Page Setup to display the "Page Setup dialog".
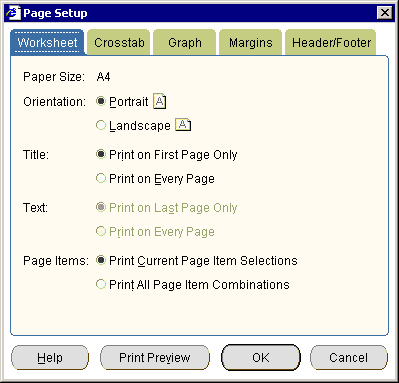
Hint: You can also display the Page Setup dialog by clicking the Page Setup button on the Print dialog or Print Preview dialog.
Use the "Page Setup dialog" to select Page Setup options for the current worksheet.
For example:
Use the "Page Setup dialog: Worksheet tab" tab to select a paper orientation, and specify the areas of the worksheet you want to print.
Use the "Page Setup dialog: Table/Crosstab tab" to select page ordering, scaling, and whether to repeat worksheet headers on each printed page.
Use the "Page Setup dialog: Graph tab" to select how to print worksheet graphs.
Use the "Page Setup dialog: Margins tab" to select margin values.
Use the "Page Setup dialog: Header/Footer tab" to add a report header or footer to a printed report.
Click OK to apply the Page Setup options.
Discoverer applies the Page Setup options for the current session. To save the Page Setup options permanently for the selected worksheet, you must save the workbook (for more information, see "How to save workbooks").
You print a Discoverer workbook when you want to print all worksheets in a workbook. When you print a workbook, you print all worksheet data and graphs based on Page Setup options selected for the individual worksheets (for more information, see "What are Page Setup options").
Note: If you want different print settings for individual worksheets, change the Page Setup options for each worksheet before you print the workbook (for more information, see "How to change Page Setup options for a worksheet").
If worksheets contain active parameters, Discoverer prompts you to enter parameter values to refine the data that you print.
To print a Discoverer workbook:
Open the workbook that you want to print.
Choose File | Print to display the "Print dialog".
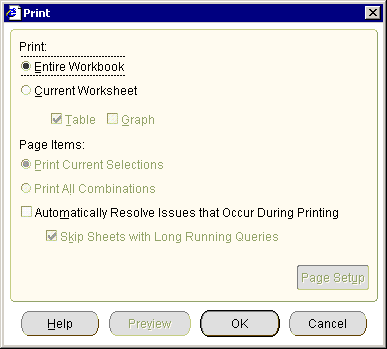
Select the Entire Workbook radio button.
Note: The Page Setup and Preview buttons and other options are grayed out when you print a workbook.
Click OK.
If any of the worksheets have active parameters, use the "Print Wizard dialog: Parameters page" to enter parameter values for each worksheet that has active parameters.
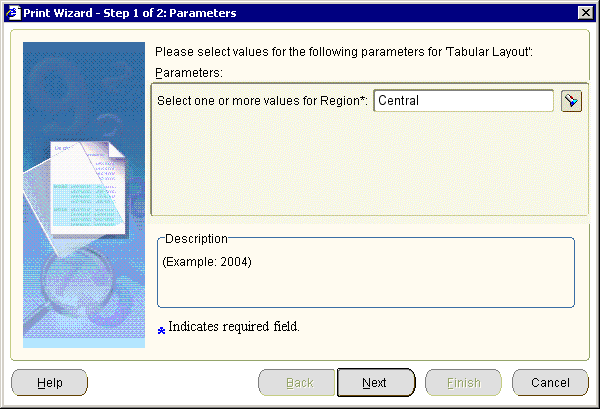
Discoverer then displays the operating system print dialog. For example, if you are using Windows, Discoverer displays the Windows Print dialog.

Use the operating system print dialog to set additional print options if required, and start the print job.
Discoverer prints the workbook on the printer selected.
You print a Discoverer worksheet to print the currently displayed worksheet. You can print the worksheet data or graph, and select the page items you want to print. If the worksheet contains active parameters, Discoverer prompts you to enter parameter values to refine the data that you print.
You can specify Page Setup options for each worksheet before you print it (for more information, see "How to change Page Setup options for a worksheet").
To print a Discoverer worksheet:
Open the workbook that contains the worksheet you want to print.
Display the worksheet you want to print.
(optional) Change the Page Setup options for the worksheet (for more information, see "How to change Page Setup options for a worksheet").
Choose File | Print to display the "Print dialog".
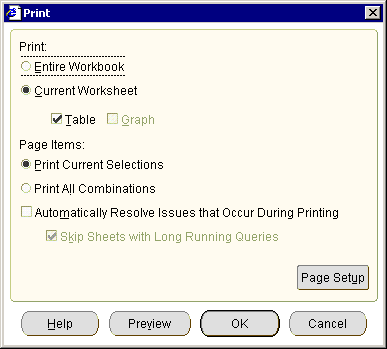
Use the Print dialog as follows:
Select the Current Worksheet check box.
Use the Table/Crosstab and Graph check boxes to specify the worksheet components you want to print.
(optional) Use the Page Items radio buttons to select the page item combinations you want to print.
(optional) If you want to change the Page Setup options for the current worksheet, click Page Setup to display the "Page Setup dialog".
For example, you might want to create a worksheet header or footer, or change the margin size.
(optional) If you want to check the printed worksheet layout before printing, click Preview to display the "Print Preview dialog".
(optional) If you want to skip Discoverer alert messages that are displayed during printing, select the Automatically Resolve Issues That Occur During Printing check box.
Click OK.
If the worksheet has active parameters, use the "Print Wizard dialog: Parameters page" to enter parameter values for each active parameter.
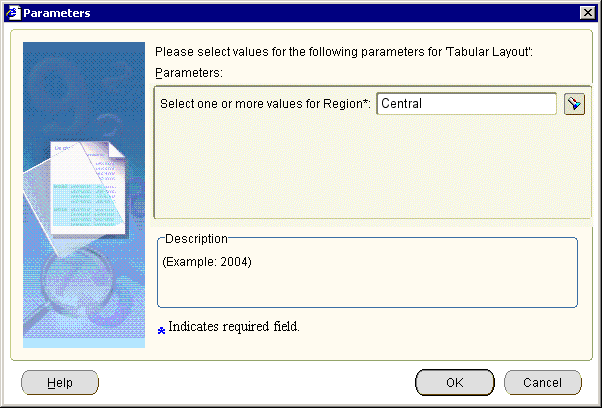
Discoverer displays the operating system print dialog. For example, if you are using Windows, Discoverer displays the Windows Print dialog.

Use the operating system print dialog to set additional print options if required, and start the print job.
Discoverer prints the worksheet on the printer selected.
When you print a worksheet with a graph in Discoverer Plus Relational, the worksheet and graph print on separate pages. To print a worksheet with a graph on the same printed page, you can do one of the following:
print the worksheet in Discoverer Viewer
use Discoverer Portlet Provider to display multiple worksheets and graphs as portlets on a single portal page, and print the portal page (for more information, see "Publishing worksheets in OracleAS Portal")
export the worksheet and graph to an external application (e.g. HTML) and print the page
Discoverer enables you to print Discoverer workbooks and worksheets to a Portable Document Format (PDF) file. For example, you might want to send an e-mail containing a worksheet to a colleague who uses PDF files to share information.
Note: You must have Adobe Acrobat installed to print to a PDF file.
To print a Discoverer workbook or worksheet to a PDF file:
Follow the instructions in "How to print Discoverer workbooks" or "How to print Discoverer worksheets" until the operating system print dialog is displayed.
For example, when you click OK on the Discoverer Print dialog, if you are using Windows, Discoverer displays the Windows Print dialog.

In the operating system print dialog, select a PDF format (e.g. Adobe Acrobat, Acrobat Distiller) from the printer list.
Follow the on-screen instructions to create the PDF file.
You can now open the Discoverer workbook or worksheet in an Adobe Acrobat reader.
Notes
You can also create a PDF file by exporting the workbook or worksheet to Portable Document Format (for more information, see "How to export Discoverer data").
You might also print to a postscript file from the operating system print dialog.
The format of worksheets in PDF format is the same as the format of printed worksheets. For example, if a worksheet is printed on three sides of A4 paper, the worksheet in PDF format will comprise three pages of A4 sized content.